
The simpler your nail design, the more technically demanding it is — a neutral base with zero embellishment means every bubble, every uneven line, and every dry patch shows in ways that elaborate art or embellishment would completely hide.
Get the finish right, time the appointment correctly, and match the shape to your actual hand proportions — those three decisions determine whether a simple nail reads as intentional or as something that didn’t happen.
1. Milky White or Ivory Manicure (Timeless & Photograph-Ready)
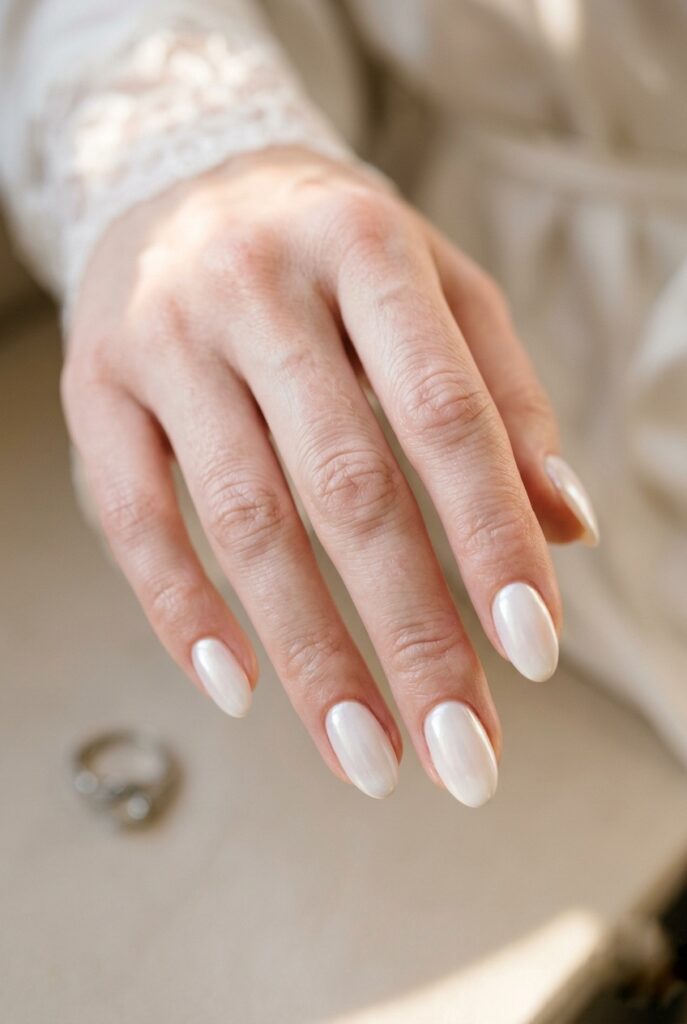
Milky white — a barely-there white with a cream or pearlescent finish — works on every skin tone and every dress color because it reads as luminous skin rather than as polish, and the sheer opaque quality means it photographs without the harshness of a solid white while still reading as a deliberate nail decision in close-up ring shots.
The finish matters as much as the color here — a cream finish photographs flat while a pearlescent finish catches light in reception photography and reads as elevated — so when you book, specify the finish by name rather than just the color, and for a full picture of how this nail sits alongside the complete range of bridal nail options available at every complexity level, the bridal nail overview covers every decision from shape to product to timing.
2. Pearlescent Chrome Finish (Modern & Reflects Like a Ring)
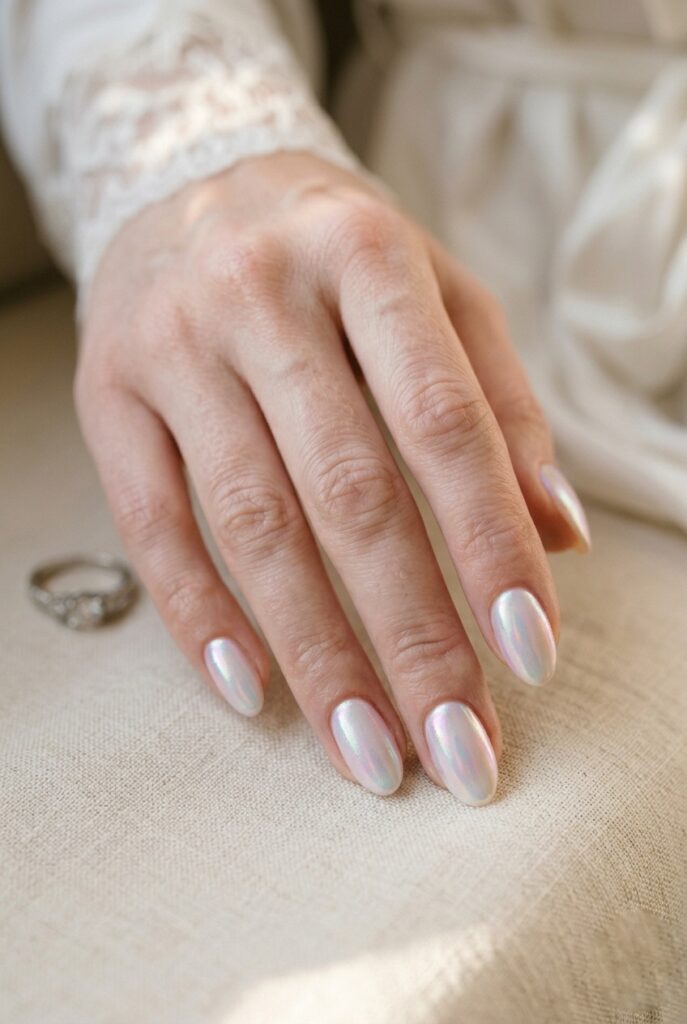
Pearl chrome is the version of chrome that reads as simple rather than statement — it is softer and more opalescent than mirror chrome, catches light like an actual pearl rather than a metallic surface, and photographs better than almost any other finish under flash because the subtle shimmer reads as elevated rather than metallic or theatrical.
The correct application is white or nude base, chrome powder buffed across the cured gel with a microfiber applicator, sealed under a no-wipe top coat — skip any salon that cannot confirm the sealing step, because unsealed chrome dulls within hours — and for the full range of elevated nail finishes that build on the same philosophy of simplicity through quality rather than complexity, the elegant bridal nails guide shows where pearl chrome sits within a broader elevated bridal nail picture.
3. French Manicure (Barely-There Tip Version)

The modern micro French — a hairline-thin white line at the nail edge rather than the wide bright-white band from an earlier era — reads as contemporary rather than dated because the tip is narrow enough that it disappears into the nail at normal viewing distance and only registers in close-up photography, which is exactly where you want the detail to appear.
This is also more forgiving to execute than a classic French because a line this thin absorbs slight imperfections that a wider band would broadcast — and for every variable that determines whether your French tip reads as refined or dated on your specific nail shape, the French bridal nails guide covers tip width by shape, base shade options, and the symmetry check to run before you leave the salon.
4. Natural Oval Nails, Zero Polish (The “Nothing” Strategy)
A professional manicure with buffer work, cuticle care, and a high-gloss clear coat on natural nails only works when the natural nail is genuinely the best feature — no discoloration, no ridges, no chips — because a clear coat over any imperfection broadcasts every flaw in close-up photography rather than neutralising it.
The color of your natural nail bed is itself a skin tone consideration — very pink nail beds read warmly under most lighting while nails with any yellow cast can photograph gray under flash — and the bridal nails by skin tone guide covers which base options, including natural nail strategies, photograph best across every complexion from cool-fair to deep.
5. Nude-Pink Base With a Single Pearl Accent

A single pearl on the ring finger accent nail — placed on top of a soft pink or nude base, sealed under a gel top coat so it sits flush with the nail surface — gives a simple manicure intentional visual weight without adding anything that competes with the ring or the dress.
The pearl must be flat-back and fully encapsulated in gel rather than just adhered on the surface, because a raised pearl on a wedding day catches on veil fabric, dress lace, and bouquet ribbon in ways that become obvious by the ceremony — the difference between a sealed pearl and an adhesive one is the difference between a detail that lasts twelve hours and one that lasts three, and the bridal nail art guide covers the full range of encapsulation and embellishment techniques worth understanding before you book this look.
6. The Glazed Donut Finish — Simple Color, Premium Result
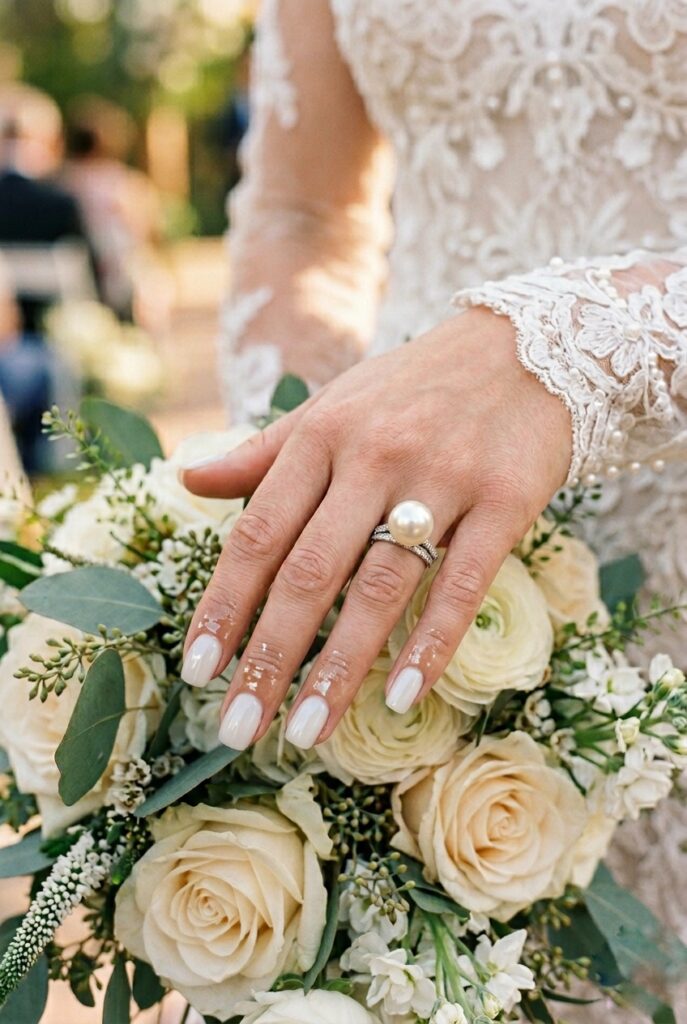
The glazed donut finish — a milky very slightly tinted white or pink with an ultra-glossy top coat that reads as wet and luminous — photographs as premium regardless of how simple the underlying color is, because the finish itself creates the dimension that most nail designs try to achieve through art or embellishment.
This requires a builder gel or specialist glossy gel formulation rather than a standard top coat — regular polish and standard top coat do not produce this level of gloss or depth — so before booking, confirm your salon has gel capabilities rather than polish-only services, and for a broader look at the glossy and dewy finishes worth comparing before you commit, the bridal nail ideas gallery covers how this finish compares against chrome, pearlescent, and matte options across different skin tones and lighting conditions.
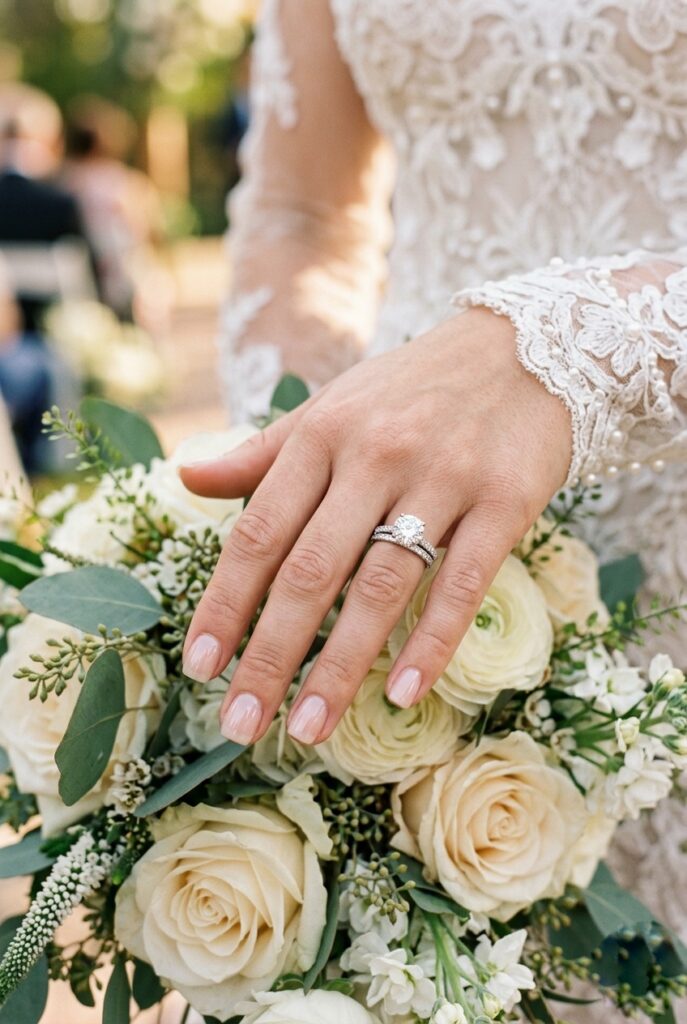
7. Ballet Slipper Pink — The Choice That Works for Nearly Everyone

Ballet slipper pink — the specific shade that sits between nude and pink with a warm-neutral undertone — photographs well across every skin tone and every dress color because it is warm enough to look intentional under reception lighting, neutral enough to never fight anything in the frame, and opaque enough to be more forgiving to apply and maintain than any sheer finish.
It is also the most shape-flexible of all simple bridal options — it reads cleanly on almond, oval, short square, and squoval without requiring any shape-specific adjustment — and if you are still deciding on shape alongside color, the square bridal nails guide covers how ballet slipper and similar neutrals perform specifically across hard square, soft square, and tapered square geometries.
Budget Hack: Buy the drugstore version a month before your wedding and test it. If you love it, great—use it for your DIY manicure. If not, you’ve only spent $6 and have time to order something else.
8. Short Squoval With a Milky Finish — Practical and Intentional

Short squoval — flat-tipped with gently rounded corners, kept at or just past the natural fingertip — is the practical and visually intentional option for brides who want the clean geometry of a square shape without snagging on lace, catching on the bouquet ribbon, or managing unfamiliar extension length through twelve hours of dancing and hugging.
A milky finish on short nails reads as deliberate and contemporary rather than as a nail that broke and was filed down — which makes this the right choice for any bride whose nail history includes breaks, lifts, or chips within the first two weeks of any extension — and for everything that makes short nails work as a complete bridal choice rather than a fallback, the short bridal nails guide covers shaping, strengthening, and the specific designs that read most intentional at minimal length.
Budget Hack: If you’re growing out your nails to shape them before the wedding, start 4–6 weeks in advance. File every 3–4 days in one direction only (not a sawing motion, which weakens them). This is free and prevents the brittleness that comes from not maintaining length as it grows.
The rule for simple bridal nails is the same as the rule for simple wedding decor: restraint is the most technically demanding version of any decision, and the preparation underneath is what makes the result look effortless.
Book your appointment three to four days before the wedding — not a week out, where subtle wear begins to show in photographs, and not the day before, where you have no recovery window — and for everything you need to keep that finish intact across a full wedding day, the bride’s wedding day checklist covers your touch-up kit and what to hand off so your nails are never a problem you are solving on the day itself.
For the complete picture of how your nail decision connects to everything else in your getting-ready plan, the bridal look guide places your nail choice within hair, makeup, and accessories so all of it works as a cohesive whole.

