

Your bridal look has to work harder than you think.
It needs to flatter your face from every angle, survive humidity and movement, photograph beautifully in three different lighting conditions, and—most importantly—make you feel like yourself, not a costume version of a bride.
This guide isn’t about trends or Pinterest aesthetics.
It’s about what actually translates to real weddings.
You don’t need a completely different look for every event.
What you need is a framework—one that adapts your core style from getting-ready photos to the reception without you feeling like someone else by the time dessert arrives.
The real question isn’t “What’s trendy?” but “What makes me look like the best version of myself?”
Soft lace against my collarbone,
borrowed pearls catching light,
the brush gliding across my lids
like someone else’s hand,
and when I look away from the mirror
I recognize myself again.
The Short Answer
Your bridal look should start with what flatters your face and your body, not with what’s trending right now.
Spend 80% of your styling budget on hair and makeup that work with your features, and 20% on accessories that shift the mood from one event to the next.
Most brides waste money on makeup trends that don’t photograph, hair styles that don’t last through dancing, and accessories that fight their face shape instead of framing it.
1. Start With Your Face Shape, Not Pinterest

Your face shape determines what actually flatters you, and it’s the one thing that never changes.
Ignore this and you’ll spend hundreds on hair and makeup that works against your features.
Round faces photograph better with defined cheekbones and side-swept styling that creates the illusion of length.
Oblong faces need width at the cheekbones—think half-up styles and fuller, rounder blush placement.
Heart-shaped faces (wider forehead, narrow chin) need balance at the jawline: consider a sleek low bun or soft waves that add width at the chin.
Square faces photograph beautifully with softness: rounded brows, curved eyeliner, and soft curls or waves instead of severe, angular styles.
Start by finding one or two hairstyle references that match your actual face shape, not just your aesthetic.
Your stylist will immediately see why one style works and another fights your proportions.
Book your consultation with both your makeup artist and hair stylist at the same time so they can coordinate how one complements the other—a heavy updo can overwhelm a delicate face, just as very light, wispy hair can get lost on someone with stronger features.
Budget: $0 (research) + $150–$400 for consultation with hair/makeup pro; Amazon or Sally Beauty, free Pinterest boards with your face shape tagged
2. Choose a Core Makeup Palette That Photographs (Not Just Looks Good IRL)

This is where most brides fail.
A makeup look that looks stunning in natural light in your kitchen might wash out completely in ceremony photos, especially if you’re outdoors or under certain lighting.
The secret: warm, saturated colors photograph better than cool or muted tones, and slightly more product than you’d normally wear translates correctly on camera.
Test your makeup during your trial in the exact lighting where your ceremony will happen.
If it’s outdoors at 2 PM, do your trial at 2 PM in outdoor light.
If your reception is in a ballroom with warm Edison bulbs, test there.
Bring multiple outfit options to your trial (your actual dress, a white robe in the same tone, a blush option) and photograph yourself in every lighting condition with your phone and professional camera.
Warm bronze and peachy tones work on almost every skin tone.
Cool, gray-toned makeup washes out on camera. Matte finishes read as flat; dewy skin reads as radiant.
The wrong version: matte brown eyeshadow from a drugstore brand applied lightly, pale nude lip, minimal blush. It looks “natural” in person and invisible in photos.
The right version: warm bronze eyeshadow with a shimmery lid, deeper warm nude lip (which still reads as neutral but has depth), and a warm peachy blush applied to the apples of your cheeks and blended up toward your temples—this reads as glowing and intentional in every photo.
Budget: $60–$150 for makeup trial; $150–$400 for wedding day makeup; Sephora, Ulta, or your makeup artist’s preferred brands
Budget Hack #1: Book your makeup trial at a Sephora or Ulta in-store, not with an independent artist if you’re budget-conscious. You’ll pay $50 for the trial (applied toward your wedding day if you book there) instead of $150–$200. You get high-quality products that photograph well, and the staff can show you exactly what colors you need to buy for touch-ups throughout the day.
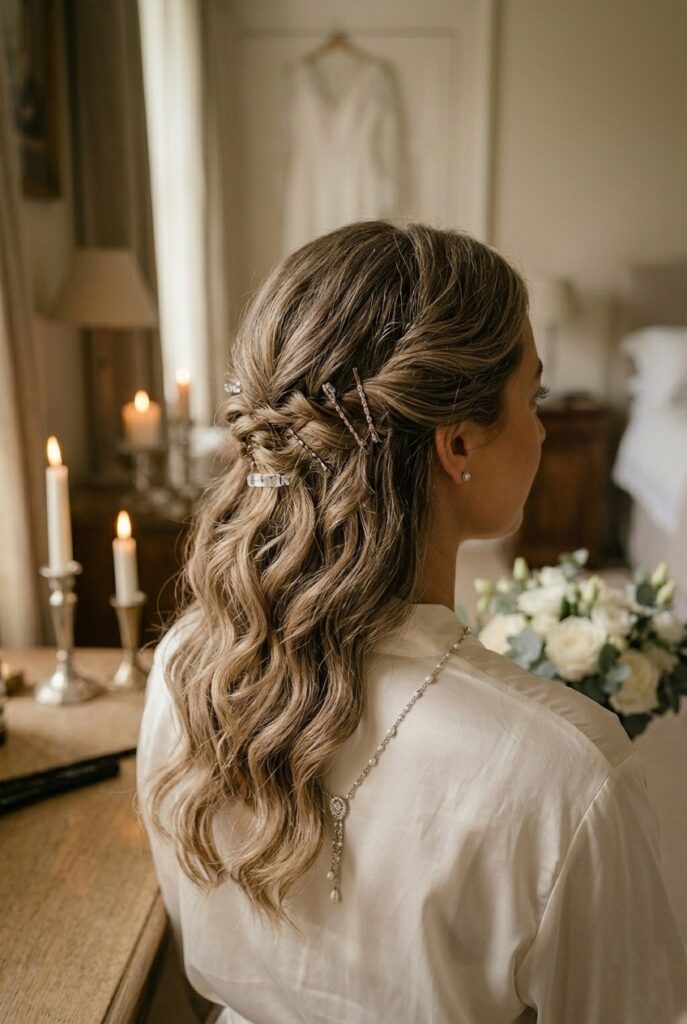
3. Hair That Lasts: The Difference Between “Pinterest Pretty” and “Actually Stays Put”
Half-up, half-down styles photograph beautifully but often fall flat by the ceremony vows if not secured properly.
Fully pinned styles with hairspray last all day but can look severe or uncomfortable.
The key is: test your style for movement and sweat. Have your stylist do your trial while you walk, sit, dance, and hug people. If pieces are falling by hour three, it’s not the right style for your wedding day.
Loose waves need product and a good hairspray (not the cheap stuff—invest in Tresemmé or Bumble and bumble).
Intricate braids need a LOT of bobby pins and light teasing for texture, plus hairspray.
Sleek buns need a round brush blow-dry, mousse at the roots, and a styler product like smoothing serum to prevent flyaways.
The wrong version: pretty, loose waves that look adorable getting-ready photos but flatten by halfway through your ceremony because there’s no texture or hold.
The right version: waves created with texture spray first, then curled, then lightly hairsprayed—they move but hold their shape all day.
Budget: $0–$80 for at-home styling + $40–$150 for professional stylist trial; Sally Beauty or Amazon for products
4. The Getting-Ready Outfit (Yes, This Matters)
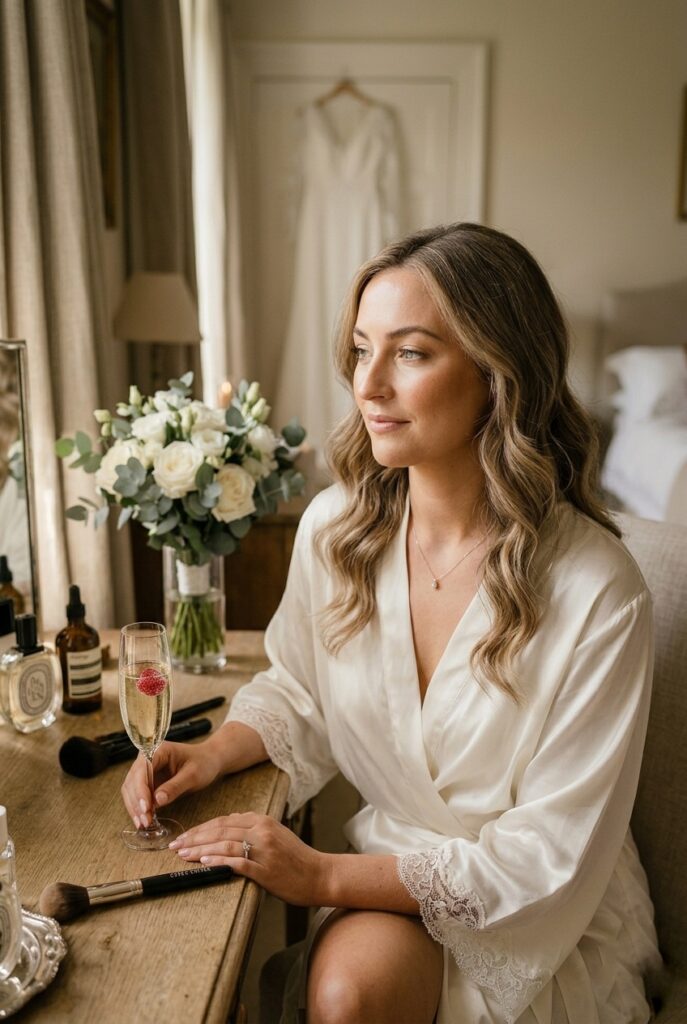
Your getting-ready outfit appears in photos, so it needs to be intentional, not just whatever you grab.
It should be comfortable, photograph well, and NOT compete with your dress. Ivory or blush silk robes are the obvious choice, but they’re also slightly cliché and can sometimes read as costume-y.
Better options: an oversized cream button-down shirt (borrowed from your partner or a parent—it reads as intimate), a soft camel sweater, or an ivory linen shirt.
Keep it simple, keep it light in color, and make sure the fabric doesn’t wrinkle badly or show every stain.
Avoid busy patterns or logos.
Skip the matching monogram robe unless that genuinely reflects your style—if it feels like you’re playing a character, it will show in photos.
Wear soft, comfortable undergarments that won’t leave marks when you change into your dress.
Have your stylist work around your robe so you don’t get makeup on it, or put on your robe after makeup is done.
The wrong version: a cheap polyester robe from Amazon that looks stiff and costume-y.
The right version: a soft linen or cotton oversized shirt in cream or ivory that moves naturally and photographs as casual-chic.
Budget: $40–$120 for a quality robe or borrowed shirt; Amazon, Etsy (search “bridal getting ready robe”), or your own closet
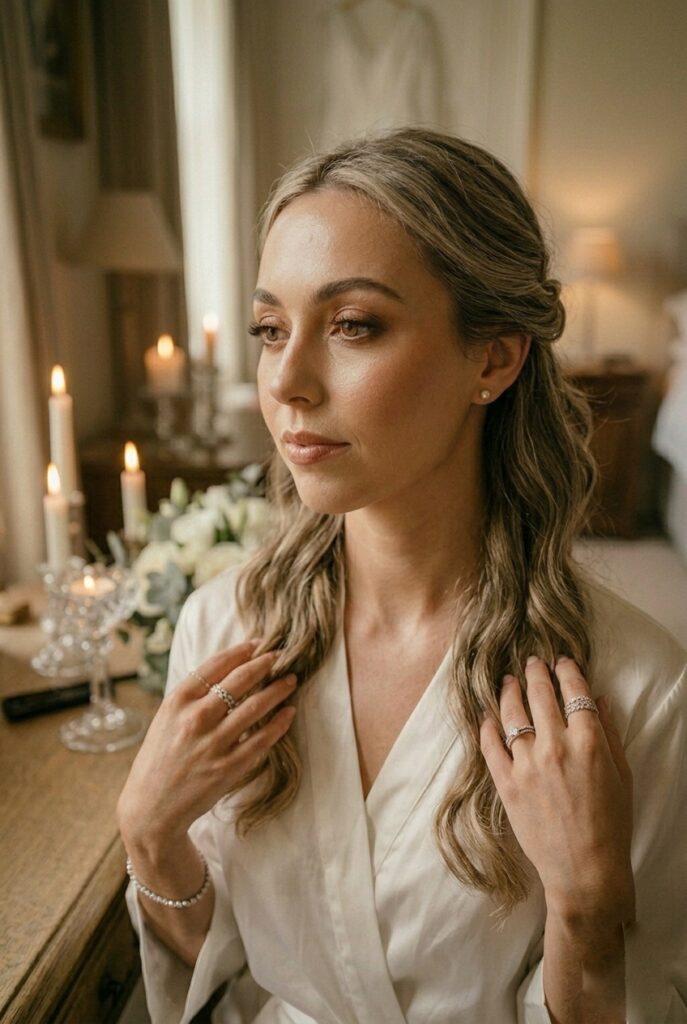
5. Ceremony Makeup: Bold Enough to Photograph, Subtle Enough to Feel Like You
Ceremony lighting is tricky.
Outdoor ceremonies in bright sun can wash out delicate makeup.
Church ceremonies with fluorescent overhead lights can make makeup look harsh.
Evening ceremonies with spotlights can blow out your features if you’re not careful.
The rule: go slightly bolder than you think you need, focusing on definition rather than heavy color.
That means: eyeliner (even if you don’t normally wear it—it defines your eyes on camera), slightly more blush than you’d wear daily, and a lip color with staying power that won’t disappear under your veil.
Add a touch of highlighter to your cheekbones and brow bone—not the Instagram-style glow, but just enough to catch light and make you look awake and radiant in photos.
Skip glitter unless it’s in your overall aesthetic; it photographs as costume-y in most settings.
The wrong version: very light, natural makeup that looks beautiful in person but invisible in ceremony photos.
The right version: defined eyes with liner, warm peachy or bronze tones, a cream or warm bronze highlighter, and a lip that’s one shade deeper than your usual.
Budget: $150–$400 for professional ceremony makeup; $30–$80 if doing your own
Budget Hack #2: If you’re doing your own makeup, buy a single high-quality eyeliner ($18–$25 from Sephora or Ulta), one warm eyeshadow palette ($15–$30), and one cream blush ($10–$20). Skip individual products and get a small set instead—it’s cheaper and colors are pre-coordinated. Bobbi Brown, Maybelline, or Flower Beauty at drugstores have excellent ceremony-ready palettes for $15–$25.
6. Reception Makeup Touch-Ups: What Actually Lasts vs. What Doesn’t
Plan for at least one major touch-up before you hit the reception (usually after you’ve finished first dances and photos).
Have your makeup artist show you exactly what products to use for touch-ups, or do a trial run on what you’ll bring yourself.
Cream products (blush, bronzer, highlighter) layer beautifully over powder and feel more natural when you reapply. Liquid products can get patchy.
Matte lipstick will likely need full reapplication; tinted lip balm is easier to touch up throughout the day without a mirror.
Bring blotting papers for excess shine, not powder, which can look cakey over 8 hours of wear.
The wrong version: bringing 10 individual products in a makeup bag, trying to reapply eyeshadow mid-reception with no mirror, and ending up looking overdone or patchy.
The right version: your makeup artist hands you one cream blush, one lip product, and blotting papers with clear instructions.
You touch up once before the reception and once before dancing.
Budget: $0 (provided by makeup artist) to $20 (if you’re buying touch-up products yourself)
7. Hair for the Reception: The 2-Option Strategy
Have a plan for your hair post-ceremony. Some brides pull down their updo and shake out waves.
Some change their hair entirely (remove the veil, add a different accessory).
Some keep it exactly the same. Whatever you choose, decide it before the wedding day and have your stylist build it into their timeline.
If your updo will be down for the reception, practice this beforehand.
Do your hair up in your actual style, take photos, then take it down. See if it falls into beautiful waves or looks like you just woke up from a nap.
If it needs refreshing, ask your stylist what products they’ll use to re-wave it.
If you want to change your hair completely, have a second style pinned up and ready (usually a half-up, half-down with your veil removed).
Your stylist can switch it in about 10 minutes between cocktail hour and dinner.
The wrong version: planning to change your hair but not communicating it to your stylist, so they don’t have the right bobby pins or products ready.
The right version: written timeline with your stylist that includes “6:15 PM: Downdo during cocktail hour” or “6:15 PM: Switch to half-up, remove veil.”
Budget: $0 (your stylist includes this); $20–$50 if you’re paying separately for a second style
8. Accessories That Actually Matter: Veils, Jewelry, and Headpieces
A veil is not required, but if you’re wearing one, it needs to coordinate with your hair style and face shape.
Birdcage veils work on almost everyone and photograph beautifully (they’re also the only veil style that doesn’t look dated).
Long cathedral veils photograph dramatically but can overwhelm delicate features. Short veils (blusher) work on stronger face shapes.
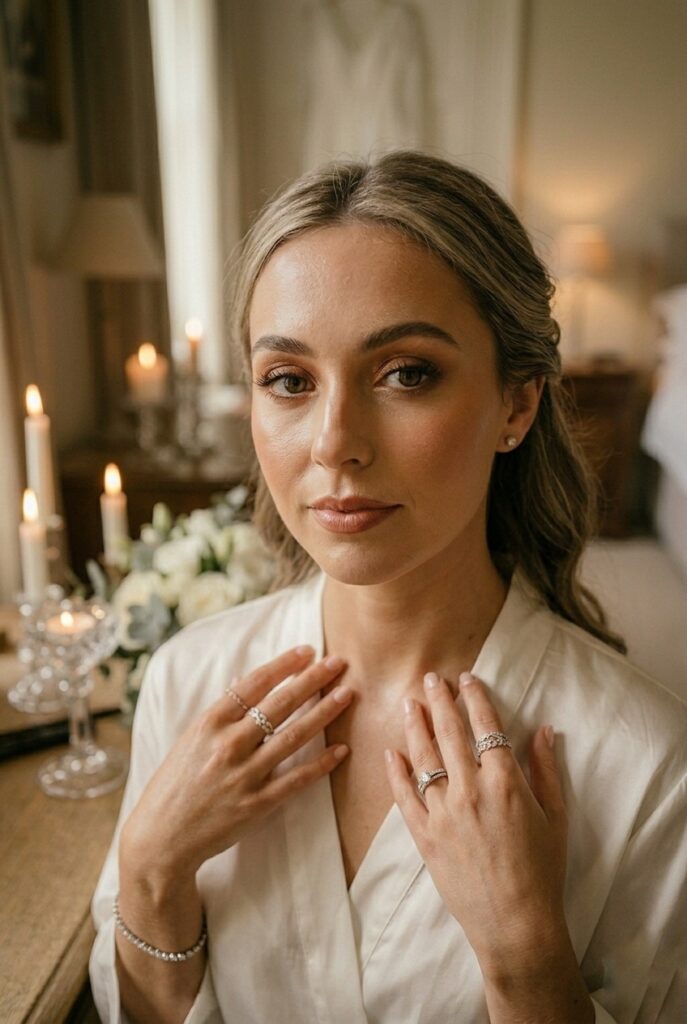
Jewelry should not fight your makeup. If you’re wearing bold eyeshadow, keep jewelry simple.
If you’re going natural, jewelry can be statement-making. Pearls work with almost every skin tone and photograph beautifully.
Avoid anything that clinks loudly (you’ll hear it in your vows audio) or catches light so much it becomes a distraction in photos.
A headpiece or hair accessory can completely change your look without changing your dress.
Consider having a simple alternative (a thin gold hairpin instead of a tiara, for example) in case your first choice feels wrong on the day.
The wrong version: a heavy tiara that pulls your hair and makes you uncomfortable, paired with long dangling earrings that compete with your makeup.
The right version: pearl stud earrings, a delicate headpiece that sits comfortably and coordinates with your veil (or skip both if that’s your style), and a simple bracelet.
Budget: $50–$300 for veil; $30–$150 for headpiece; $100–$500 for jewelry; Etsy, Amazon, or a bridal shop like Brides by Noe or David’s Bridal
9. Skin Prep: What Actually Makes a Difference
Professional makeup looks professional partly because of skill, but also because the base is prepped correctly.
Start a skincare routine 4 weeks before your wedding.
You don’t need expensive products—a good cleanser, a lightweight moisturizer, and sunscreen are enough.
The goal is hydrated, calm skin with no active breakouts on your wedding day.
Avoid trying new skincare products the week before your wedding. If you’re prone to breakouts, talk to your makeup artist beforehand—they know how to cover imperfections beautifully without looking heavy.
Do not over-exfoliate the week of your wedding; dry, flaky skin is harder to work with than calm skin.
The night before, do a hydrating face mask (sheet mask from Sephora, $8–$15) and go to bed early.
Morning of, splash your face with cool water to reduce puffiness, apply your moisturizer and sunscreen, and eat breakfast so you don’t look pale.
The wrong version: starting a new acne medication two weeks before the wedding, panicking when your skin reacts, and having heavy, cakey makeup applied to cover it.
The right version: consistent, gentle skincare for one month prior, clear skin on the day, and minimal coverage needed.
Budget: $40–$100 total for a 4-week skincare routine; drugstore brands work fine (CeraVe, Cetaphil, Neutrogena)
Budget Hack #3: Buy a hydrating sheet mask set on Amazon right now (20 masks for $15–$25). Use one every other night for the four weeks before your wedding. Your skin will be visibly more hydrated and glowing, which means your makeup artist needs less foundation and your photos look more radiant. This single hack saves $50+ on professional makeup because they’re working with better skin.
10. The Rehearsal Dinner Look: Set the Tone for the Weekend
Your rehearsal dinner outfit should feel special but distinctly different from your wedding dress.
This is where you can take a fashion risk you might not take on your actual wedding day.
Wear the bold color, the interesting silhouette, the statement accessory.
Keep it sophisticated—this is still a formal event—but let your personal style show.
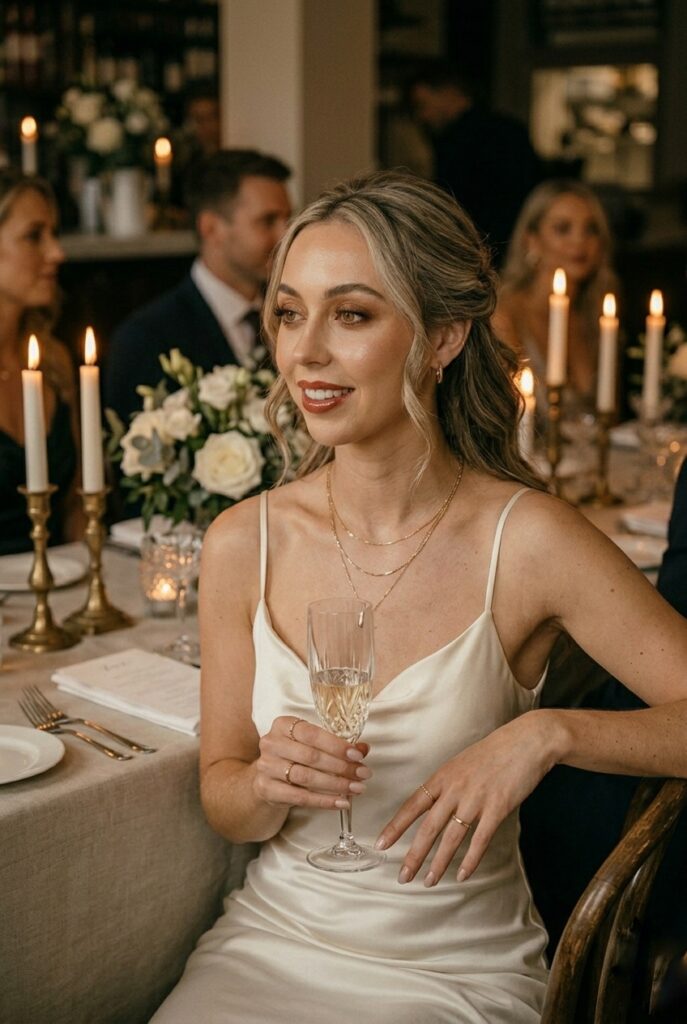
A sleek satin slip dress, a white tuxedo, an ivory lace jumpsuit, a champagne-colored mini with heels.
All work. What doesn’t work: wearing something that could pass as a second wedding dress (tulle, full skirts, heavy beading).
You want clear visual separation.
Hair and makeup can be slightly less formal than your wedding day.
You can try the bold lip, the graphic eyeliner, the second hairstyle you were considering.
Think of it as a makeup and hair trial run in front of an audience—it’s a lower-stakes way to test what makes you feel confident.
The wrong version: a lace white gown that looks like a second wedding dress.
The right version: a silk slip dress or tuxedo in ivory, blush, or champagne that signals you’re the bride but shows a different side of your style.
Budget: $100–$300 for a rehearsal dinner dress; ASTR the Label, Revolve, Lulus, H&M, or your own closet
11. Your Engagement Photos: Testing Your Wedding Day Look
Schedule your engagement photos 2–3 months before the wedding.
Use this session as a full dress rehearsal for your hair, makeup, and accessories.
This is where you find out if your chosen makeup style photographs well, if your hair holds through movement, and if your accessories feel comfortable.
Ask your photographer to shoot in similar lighting to your wedding ceremony (if you’re having an outdoor ceremony, do outdoor engagement photos; if indoors, request an indoor session or location).
Have your makeup artist and hair stylist do your photos if possible—it’s the only way to know exactly how long hair takes and if the makeup translates on camera.
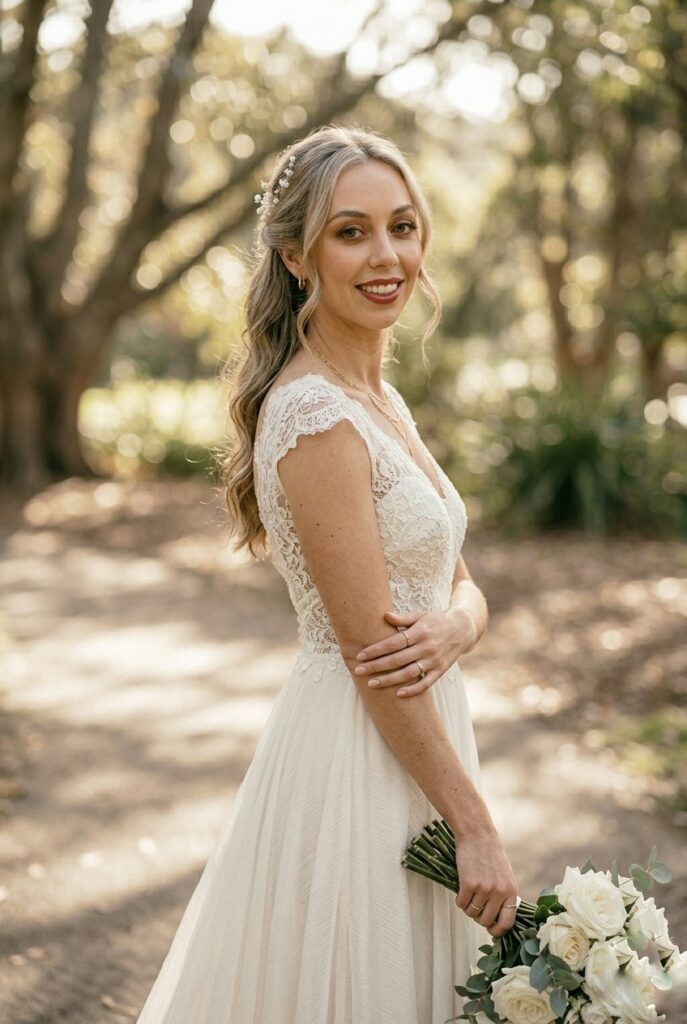
Wear your actual wedding dress or a similar style dress in the same color.
Bring all your accessories and test how they photograph. This is your chance to make changes before the wedding day.
If your veil looks wrong, if your makeup washes out, if your hair doesn’t last through movement—you’ll know with time to adjust.
The wrong version: skipping engagement photos and assuming your wedding day look will just work.
The right version: treating engagement photos as a full practice run and taking detailed notes on what your stylist did so you can replicate it on the wedding day.
Budget: Usually included in your overall photography package or $300–$800 if separate
Decision Filter
If your budget is tight, spend it on hair and makeup (the two things that change your face), not on elaborate accessories.
A great haircut and professional makeup will make you feel more like a bride than a $300 headpiece will.
If your venue is outdoors and very bright, lean toward bolder makeup than you think you need and test it in actual sunlight.
If your reception is intimate (under 100 guests), you can do a more experimental makeup look since the stakes feel lower.
If your ceremony is traditional and formal, save bold makeup for the rehearsal dinner.
The Real Reason
Here’s what vendors won’t tell you: most brides are overly cautious with their makeup and hair.
You’re worried about looking “too done” or “overdone,” so you ask for something light and natural.
Then ceremony photos come back and you’re practically invisible in half of them.
Professional makeup artists know that “natural” on camera requires heavy-handedness in person.
They’re used to brides saying “that’s too much” during application and then being shocked at how perfect it looks in photos.
Another insider truth that will save you money: your hair stylist and makeup artist do not need to be the same person. In fact, sometimes they shouldn’t be.
A talented makeup artist might not specialize in hair, and vice versa. Interview and book each separately based on their portfolio of actual wedding work, not because they’re a package deal.
If you book them together and one isn’t your style, you’re stuck.
The most expensive mistake I’ve watched brides make: booking a makeup artist based on Instagram photos that are heavily edited and professionally photographed.
When that makeup artist works on your actual face in your actual lighting, the look doesn’t translate.
Always ask for before-and-after photos from real wedding days in various lighting conditions—not studio shots, not edited photos, not heavily filtered images.
Mistakes to Avoid
Mistake 1: Choosing a makeup look because it’s trending, not because it photographs on you. Smokey eyes are everywhere right now, but if warm tones wash you out, a smokey eye (which relies on cool grays and blacks) will make you look tired in photos.
Your makeup should be trendy in execution (application skill, finish, longevity) but classic in color.
Warm bronzes, peachy tones, and warm nudes photograph on every skin tone.
Cool grays, cool pinks, and very pale nudes wash out on most people.
Test your specific makeup on your specific face in your specific wedding lighting before committing.
Mistake 2: Spending $800 on a makeup artist and $50 on skincare. Your makeup artist is only as good as the skin they’re working with.
Dehydrated, inflamed, or breakout-prone skin requires heavy coverage, which ages you and reads poorly in photos.
Spend $100 on a solid skincare routine for the month before your wedding and you’ll save $200+ on makeup coverage.
Your makeup artist can use less product and focus on enhancement instead of correction.
Mistake 3: Not doing a full hair and makeup trial before your wedding day. You discover on the morning of your wedding that your hair falls flat by 3 PM, or your makeup creases under your eyes, or your chosen eyeliner color feels wrong.
By then, it’s too late. Book a trial at least two weeks before your wedding.
This costs extra money ($100–$300) but it’s the most important investment you’ll make because it prevents disasters on the day.
Mistake 4: Assuming your stylist will remember exactly how to recreate your trial look. Take detailed photos of your trial from every angle, in different lighting.
Have your makeup artist write down product names and shades. Have your hair stylist write down exactly how many bobby pins were used, where they were placed, and what products were applied.
Send this information to both of them the day before the wedding so it’s fresh in their minds.
They’re professionals doing multiple events per week—they won’t remember your trial look from two weeks ago unless you remind them.
FAQ
How far in advance should I book my makeup artist and hair stylist?
Book both 4–6 months before your wedding if you’re in a major city, 2–3 months if you’re in a smaller area.
Popular artists book up fast, especially for peak wedding season (April through October). Once you book, you’ll likely schedule your trial 1–2 months out.
The earlier you book, the more likely you’ll get your first choice of artist and trial date.
Can I do my own wedding day makeup?
Only if you do makeup regularly and have tested your exact look multiple times in your actual wedding lighting.
Professional makeup artists have years of experience blending, correcting, and creating looks that last 12+ hours and photograph beautifully.
If you’re not professionally trained, the stakes are high for a single-day, no-do-over event.
Most brides who DIY wish they’d hired someone. Budget for a professional if at all possible.
What’s the difference between bridal makeup and regular makeup?
Bridal makeup uses slightly heavier, more pigmented products that photograph well and last through heat, humidity, and movement.
Products are chosen specifically for longevity (liquid eyeliner that won’t smudge, waterproof mascara, long-wearing foundation).
Application is slightly more dramatic than everyday makeup to account for camera flash and distance.
Bridal makeup artists also understand how different lighting conditions affect makeup and can adjust accordingly.
Should I wear false lashes on my wedding day?
Only if you wear them regularly and they feel comfortable. If false lashes are new to you, they’ll feel heavy and distracting all day.
If you’re used to them, they photograph beautifully and add drama without much effort.
Your makeup artist can apply strip lashes or individual extensions during your makeup application.
If you’re unsure, test them during your makeup trial.
Budget Table
| Item | Budget Range | Where to Buy | Notes |
|---|---|---|---|
| Hair & makeup trial | $150–$400 | Independent artist or salon | Book 1–2 months before |
| Wedding day makeup | $150–$400 | Independent artist or salon | Usually includes touch-ups |
| Wedding day hair | $100–$300 | Independent stylist | Can be same person as makeup or separate |
| Rehearsal dinner outfit | $100–$300 | ASTR, Revolve, H&M, Lulus | Often worn again post-wedding |
| Getting-ready robe | $40–$120 | Amazon, Etsy, your closet | Not necessary; borrow if possible |
| Veil | $50–$300 | Etsy, David’s Bridal, Brides by Noe | Birdcage or short veils photograph best |
| Headpiece/tiara | $30–$150 | Etsy, Amazon, bridal shops | Coordinate with veil |
| Jewelry (earrings, bracelet, necklace) | $50–$500+ | Etsy, Amazon, jewelry stores | Pearls work with any skin tone |
| Skincare routine (4 weeks) | $40–$100 | Drugstore or Sephora | Not negotiable; invest here |
| Makeup touch-up products | $0–$30 | Provided by artist or drugstore | Often included with your makeup artist |
| TOTAL | $720–$2,530 | — | Flexible depending on priorities |
The mistake most brides make is thinking their wedding day look is about the dress. It’s not.
Your face and hair are the focal point of every photo.
You can have a $5,000 dress and a $150 makeup job and look mediocre, or a simple dress and professional hair and makeup and look stunning. Invest accordingly.
Book your hair and makeup team now.
Do your trial two months out. Take photos in your actual wedding lighting. Adjust.
Show up confident. The rest will follow.