Most bridal shower invitations end up in a drawer or the recycling bin within 48 hours — not because the design was poor, but because every design decision was made and no wording decision was made at all.
The invitations that stay on kitchen counters for weeks are the ones that say something true about the bride — one sentence that only her closest people could write — paired with one strong material choice that signals the event will be worth showing up for.
1. Lead with the Bride’s Story, Not Generic Humor
Stop-the-scroll wording does one thing consistently: it says something specific to this bride that only someone who loves her could write, rather than a pun that works on every invitation ever printed.
“Sarah collects vintage teacups and strong opinions in equal measure” keeps an invitation on a counter far longer than “last fling before the ring,” and the body details — time, date, location — need no creativity, which means your one true sentence about who she is carries the entire emotional weight of the piece.
2. Upgrade the Cardstock Weight (Not the Design)

A 110 lb cardstock invitation feels considered before anyone reads a word — the physical weight communicates intention in a way that elaborate foil printing on thin paper never can, because guests feel the paper before they see the design.
Start with heavyweight cream, natural white, or soft gray cardstock and keep the design restrained to one or two colors, and the budget-conscious approach of a simple two-color design on 110 lb stock from a local print shop at $25–$30 per 50 cards consistently outperforms elaborate designs on 80 lb paper at $40–$60.
3. Write the Date and Time in a Way That Feels Personal
“Saturday, June 14 from 2 to 5 p.m.” reads like an afternoon someone is hosting — “Saturday, June 14 at 2:00 p.m.” reads like a board meeting — and the difference in how guests feel about arriving is measurable before they even check the calendar.
Replace “regrets only by June 3” with “let me know by June 3 if you can’t make it — no pressure if life is chaotic,” include the host’s phone number and email with “text, call, or email — whatever’s easiest,” and every standard template phrase you remove and replace with something a real person would say makes the event feel less like an obligation and more like an invitation.
4. Include One Specific Line About What to Expect

“Afternoon tea with pastries and champagne” tells guests what to wear, what to expect, and what the vibe is — “bridal shower” tells them nothing except that gifts are probably involved.
One sentence about what you’re actually doing gives guests everything they need to arrive correctly dressed and correctly prepared: “casual afternoon in the garden with snacks and champagne” communicates weather expectations, dress code, vibe, and food, and for brides planning an outdoor garden shower specifically, that single sentence prevents more logistical anxiety among guests than any RSVP form ever will.
5. Use Hand-Lettered Text or Calligraphy for the Bride’s Name Only
Calligraphing everything reads as trying too hard and becomes illegible at the edges — but the bride’s name in a quality calligraphy font or commissioned hand-lettering creates a focal point that signals this invitation was made for her specifically, not assembled from a template.
Pair a hand-lettered name with simple clean type everywhere else — the contrast is what makes the calligraphy feel intentional rather than decorative — and a free calligraphy font from Google Fonts for the name plus $30 on heavyweight cardstock printing creates something more distinctive than an elaborate paid template on standard paper.
6. Choose One Color Palette and Stop
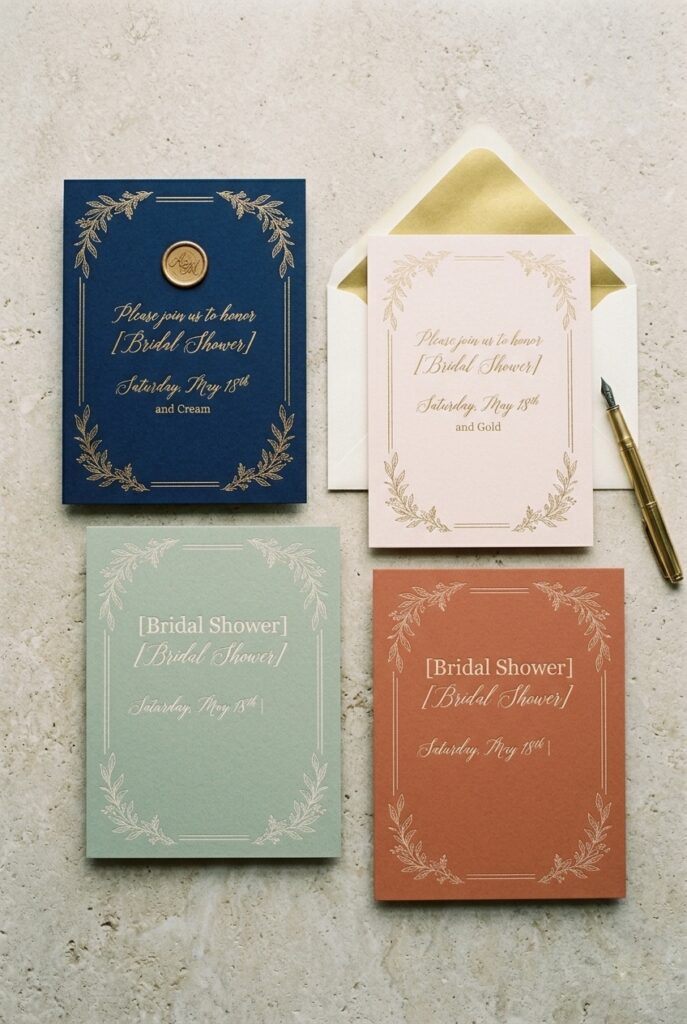
The invitations that read as expensive use one primary color paired with white or cream — one color signals intentional, five colors signal undecided, and this rule applies equally to digital and printed formats.
If the bride loves blush and gold, the invitation is blush, gold, cream, and black text — nothing else — and the simple, considered design principle of limiting your Canva palette to three colors maximum forces the kind of editorial restraint that consistently reads as more sophisticated than any amount of added visual complexity.
7. Skip the Photo; Use Custom Illustration Instead
Engagement ring photos and couple portraits feel standard now because every other invitation is using them — a custom illustration of the bride’s favorite flower, her dog, or something from her actual story costs $50–$150 from Fiverr or Etsy and creates something genuinely distinctive that no other invitation at her shower will replicate.
If you do use a photo, make it unexpected — a candid, non-posed shot where she actually looks like herself, not a professional engagement portrait — because the gap between “this is exactly her” and “this is any bride” determines whether the invitation stays on the counter or disappears into a pile.
8. Hand-Address the Envelopes (Or Find Someone to Do It)

Hand-addressed envelopes make guests feel seen before they open anything — mass-printed addresses on envelopes communicate bulk mailing, while your guest’s name in real handwriting communicates that someone sat down and thought about them specifically.
If your handwriting is confident, address them yourself with a quality black or gold pen at $5–$10 total — if not, spend $30–$60 to have them professionally addressed through Etsy or a local calligrapher — and if you want to channel the same careful, deliberate approach into the DIY wedding projects surrounding the shower itself, that same investment-of-time principle carries through every handmade element of the day.
9. Send Digital Only for Virtual or Ultra-Casual Showers
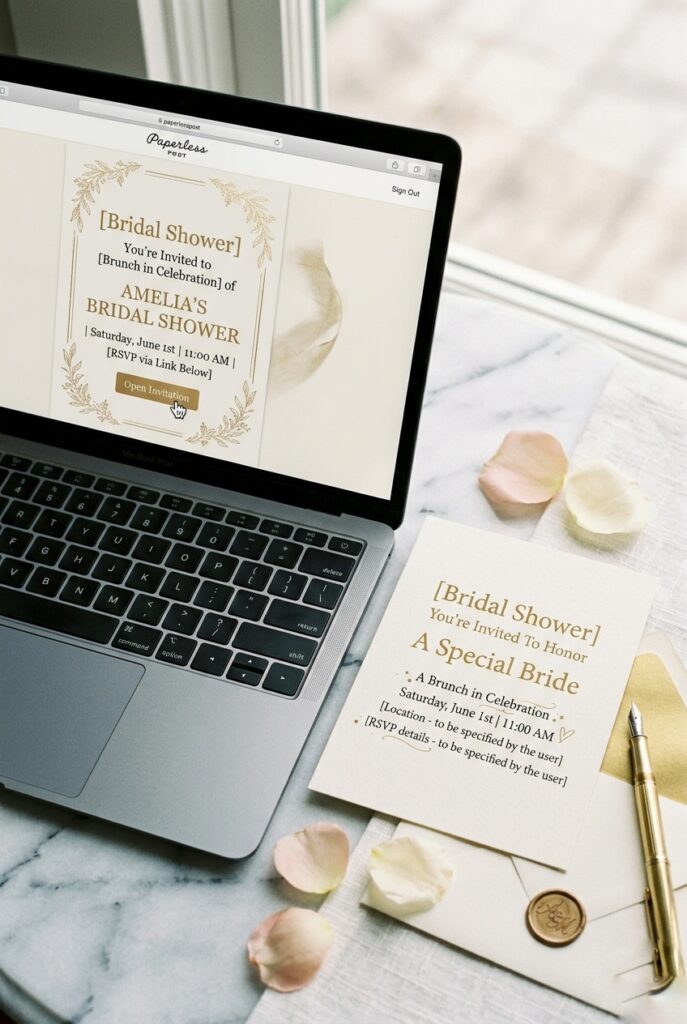
For an in-person shower, a printed invitation tells guests the event was worth the physical effort of sending paper — a digital invitation tells them you completed the task on your phone, and those two different feelings about the event start forming before anyone reads the date.
If you go digital, Paperless Post is the only digital platform whose design quality communicates intention rather than convenience, and for an indoor shower setting with a structured venue, time, and dress expectation, the physical printed card is almost always the right call for the impression the event deserves.
10. Include a Line That Makes Guests Feel Like Insiders
One sentence that gives guests context — “this is a surprise, don’t tell her” or “Emma is finally doing this and we’re all so happy” or “we’re celebrating six months of wedding planning, bring your best stories” — makes guests feel like participants rather than attendees, which is the difference between people who show up and people who arrive.
This sentence costs nothing and takes thirty seconds to write, yet it does the entire work of creating a feeling: it tells guests they’re not just filling a room but part of something that matters to someone they care about.
11. Forget Photo Insert Cards; Use a Custom Wax Seal Instead

When someone opens an envelope and encounters a wax seal, they pause — the tactile experience of breaking it signals that this invitation was assembled by a person who made a series of small deliberate choices, rather than processed through a fulfillment center.
A custom wax seal with the bride’s initials or a symbol that matters to her runs $20–$40 online through Etsy, sealing wax costs $10–$15 for a complete set, the total investment is under $55, and for the same reason that elegant event details consistently outperform visually busy ones — a single unexpected tactile detail outperforms a dozen decorative printed inserts.
12. Budget Hack: DIY Envelope Liners for Surprise Impact
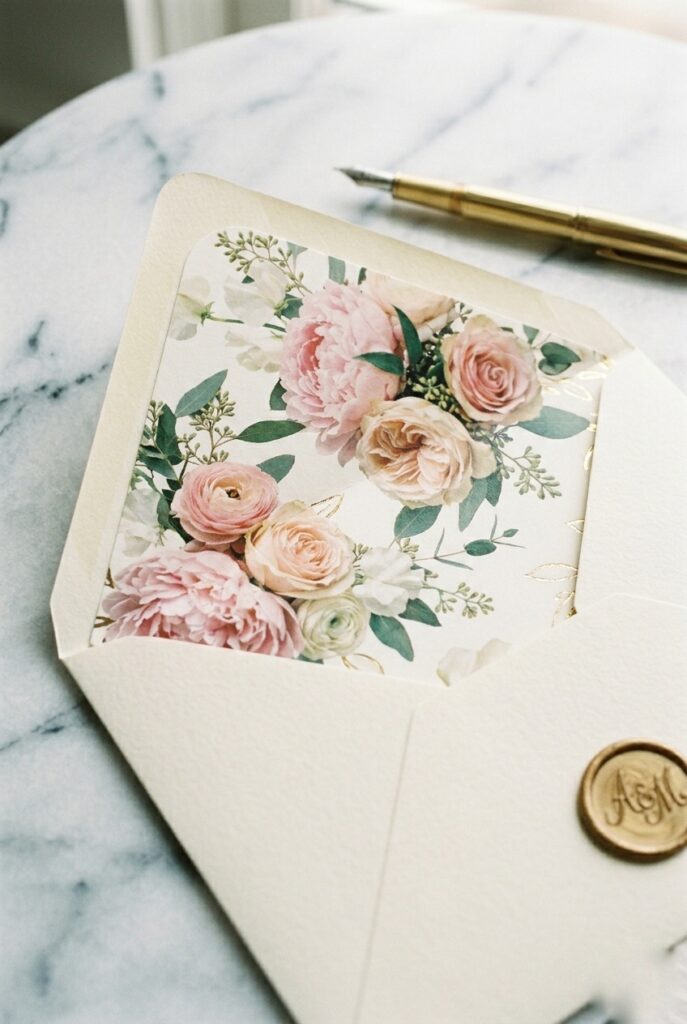
A custom envelope liner — designed in Canva, printed on cardstock at home, cut to fit, and glued inside the envelope — creates a detail guests see the moment they open the invitation that almost nobody else is doing, at $5–$15 for 30 envelopes.
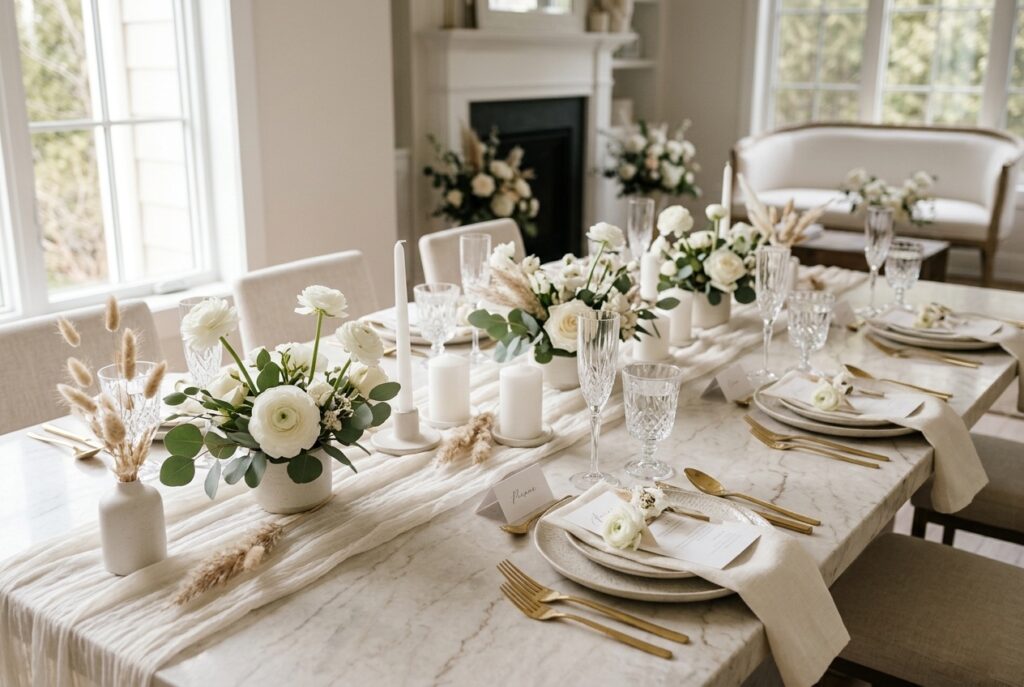
The bride’s favorite colors, a pattern that carries the shower’s theme, or a meaningful quote printed inside the envelope gives guests the first feeling that the event is going to be worth the trip, and for the full decoration picture that carries this same considered approach from invitations through the party itself, the bridal shower decoration guide covers every element from tablescapes to the entry display.
Choose one upgrade — cardstock weight, hand-addressed envelopes, or a single honest sentence about the bride — and execute it well, because one detail done with intention carries more than twelve details done adequately, and the shower table decor guide will help you carry the same intentional approach from the invitation through every surface at the party.