A DIY backdrop that looks professional and one that tips over mid-ceremony are built from almost identical materials — the difference is three decisions most guides skip: base depth, pipe diameter, and whether you tested the fully loaded structure before the wedding day.
Every step below is ordered to get those structural decisions right before you touch a single piece of decoration.
For the broader design choices that come before the build — arch shape, scale against ceiling height, fabric type — the backdrop design decisions guide covers those fundamentals first.
1. Choose Your Material: PVC Pipe vs. Wood vs. Buying a Frame
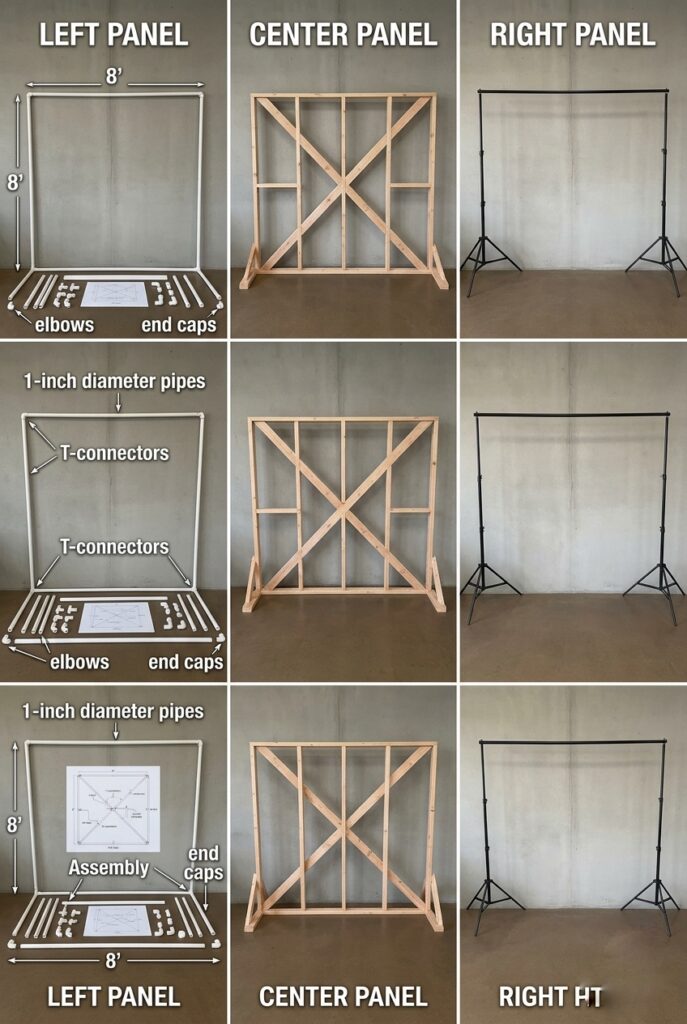
PVC pipe at one-inch diameter costs $150–$250 for an 8×7-foot frame, requires no advanced tools, and breaks down into transportable pieces — but it bends under heavy decoration and tips in wind without proper weighting, so it suits fabric-and-garland builds, not dense flower installations.
Wood studs run $250–$400, are significantly more stable under weight, and handle heavy florals without flex, but they require a handsaw and a helper to transport; if you lack tools or confidence in structural assembly, renting a pre-made backdrop stand at $100–$300 and spending your effort only on the dressing is almost always the smarter call. For how each material choice affects the finished look at different ceiling heights and in different venue types, the full backdrop guide covers proportions and frame decisions together.
2. The PVC Pipe Build: Exact Measurements and Material List (No Guessing)
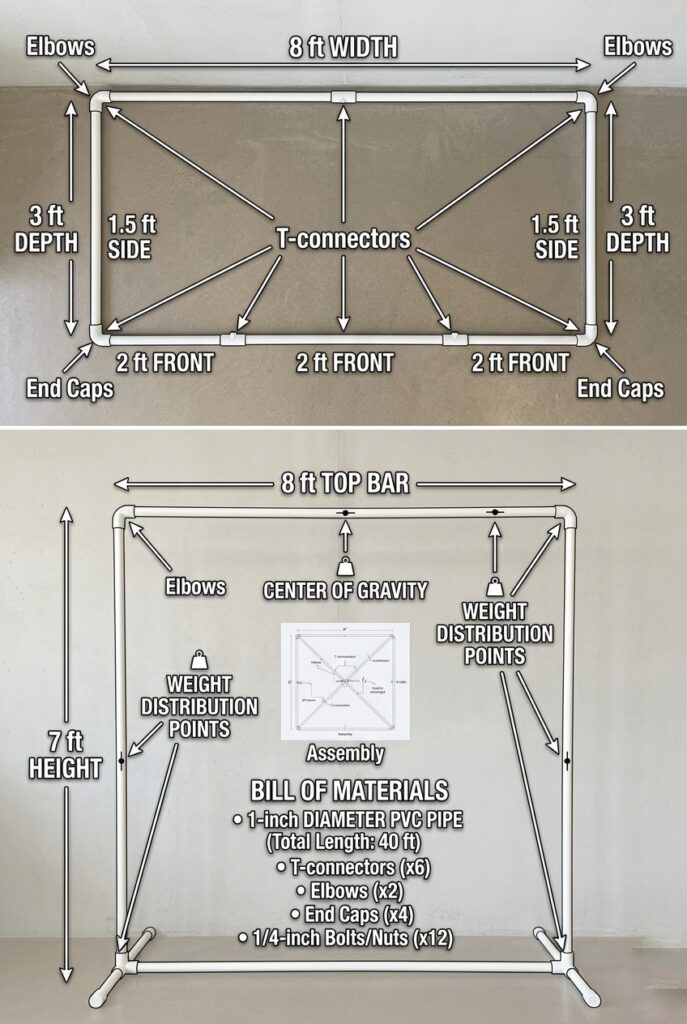
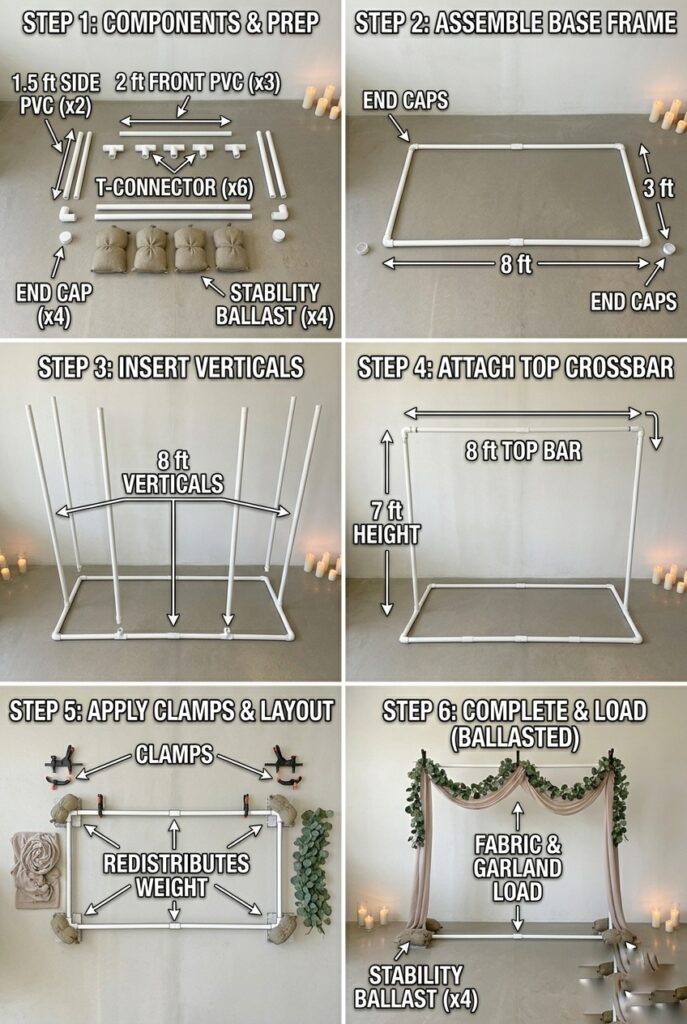
For a standard 8-foot-wide by 7-foot-tall frame, buy three lengths of 10-foot one-inch Schedule 40 PVC pipe, two 90-degree slip-fit elbows, eight T-connectors, and eight end caps; ask the hardware store to cut the pieces to length for you at no charge — two 8-foot pieces, two 7-foot pieces, eight 1.5-foot base legs, and four 2-foot cross braces.
Assemble the base rectangle first using the T-connectors and cross braces, then insert the verticals, then connect the horizontal top bar with the elbows — every joint must push fully flush with zero gap, and if anything has give when you push it, the connection is not complete. For how this frame size and base proportion scales to different venue ceiling heights, the indoor backdrop proportions guide covers the 60–70% ceiling height rule that determines whether your frame reads as substantial or undersized in the room.
3. Fabric: Matte Linen vs. Polyester (and Why One Costs Less and Looks Better)
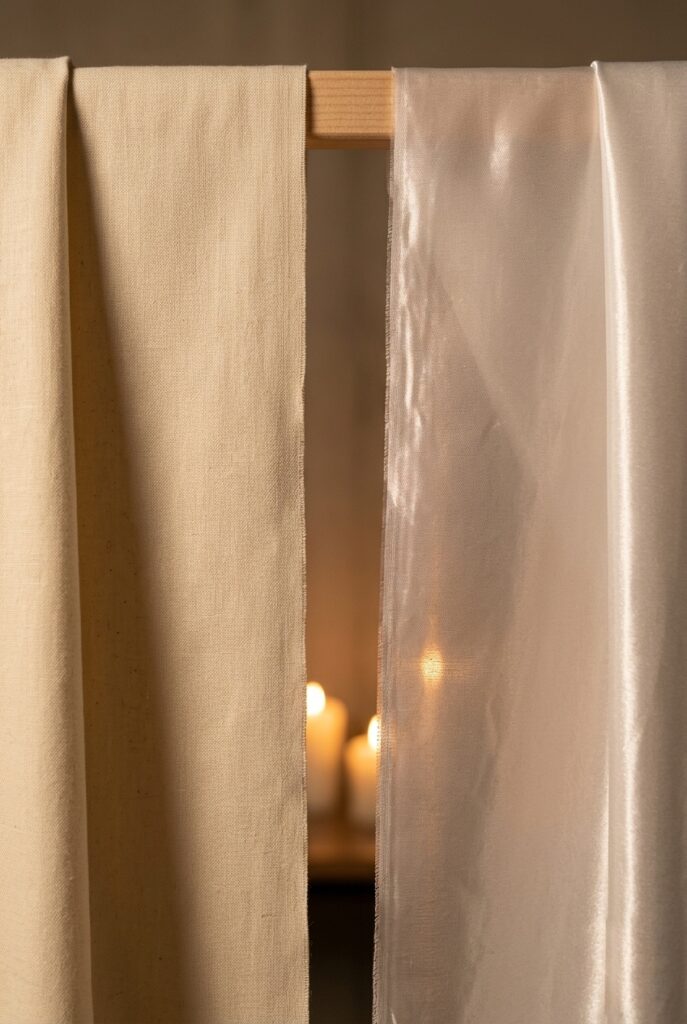
A 10×7-foot canvas drop cloth from a hardware store at $25–$35 drapes beautifully, photographs as matte and intentional, and costs $270 less than the same square footage in “wedding backdrop fabric” sold online — the visual result is identical because what reads as elegant is the matte surface texture, not the fabric’s origin or label.
If you want a specific colour, dye a white canvas drop cloth with fabric dye for $5–$10 rather than hunting for the right shade in specialty fabric; for neutral ivory or cream, buy 50 yards of discount linen from a fabric retailer on sale at $4–$8 per yard rather than paying $15–$25 per yard for wedding-labelled equivalents. If you want a simple backdrop that is purely fabric with no additional embellishment, this fabric approach alone — draped with generous pooling at the ground — is sufficient.
Budget Hack #1: Buy a white or cream canvas drop cloth from Home Depot ($25–$35) instead of wedding backdrop fabric ($300+). If you want color, pick up a box of fabric dye ($5) from a craft store and dye it in your bathtub following package instructions. This costs $30–$40 total, produces identical visual results to a $400 fabric backdrop, and you have a usable drop cloth for future projects. Source: Home Depot (search “canvas drop cloth”), Joann Fabrics (end-of-bolt sales), or buy standard linen from fabric.com.
4. Securing Fabric Without Damaging Your Frame
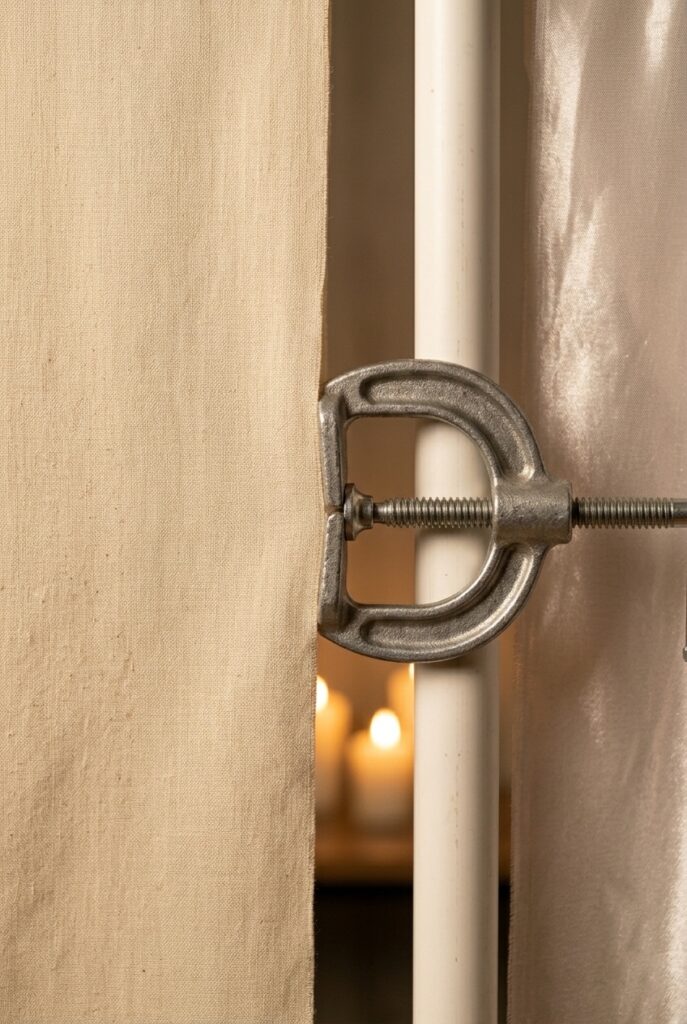
Heavy-duty clamps from a hardware store at $20–$30 for a set of four are the correct tool — they lock onto the pipe with a screw mechanism, hold fabric taut without wrinkling, leave no residue, and are fully reusable for every future use of the frame.
Zip ties work in a pinch but are single-use and leave visible tie marks where they meet the fabric fold; avoid tape, pins, and hot glue entirely — tape falls off under fabric weight, pins rip delicate fabrics, and hot glue damages both PVC and fabric permanently.
5. Weight Limits: Know What Your Frame Can Hold
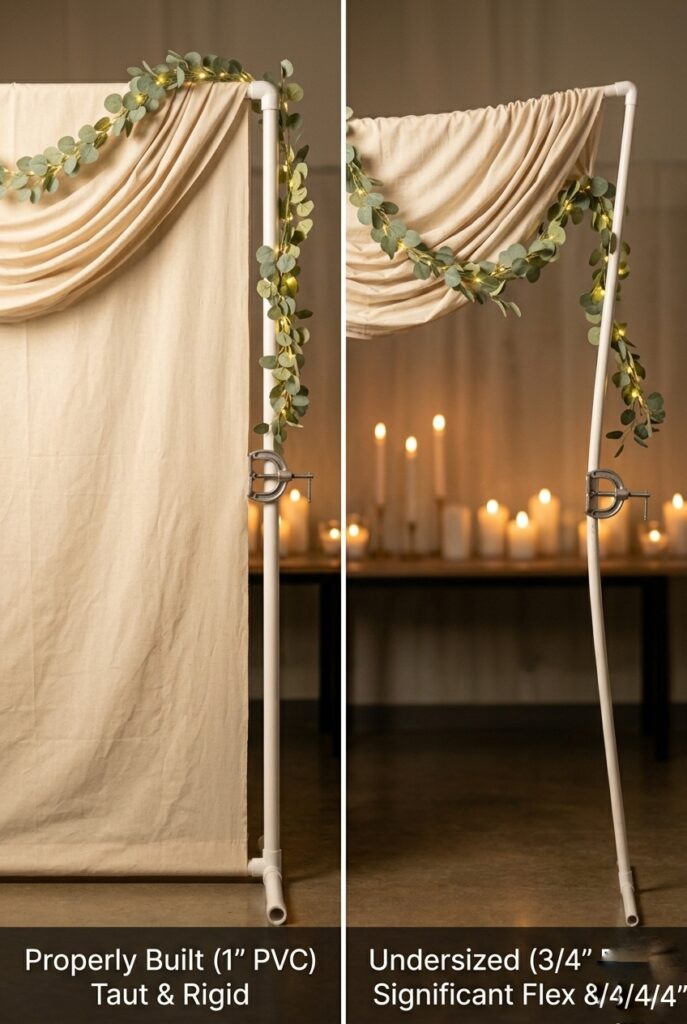
One-inch PVC with a proper base safely holds plain fabric, lightweight greenery garland, string lights, and small floral accents — up to approximately 50–70 pounds total distributed across the frame — but will flex visibly and potentially fail under a dense flower wall, heavy velvet fabric plus extensive florals, or garland covering every side simultaneously.
Test your fully decorated frame three days before the wedding by loading it with the exact weight of your planned decorations and leaving it for 24 hours; if it flexes or leans at any point, either upgrade to 1.25-inch pipe, switch to wood, or reduce the decoration load before the wedding day when there is no time to fix structural failures. For detailed guidance on which decoration materials stay within a DIY frame’s weight capacity, the backdrop decoration materials guide covers weights, densities, and what to use where.
Budget Hack #2: Load-test your frame 72 hours before the wedding using sandbags or water jugs as test weight. Buy two 50-pound sandbags ($20 total) and hang them from the top bar, positioned exactly where your flower accents will hang. Leave them for 24 hours. If the frame flexes or tips, you know you have a problem with 3 days to fix it (upgrade materials, reduce decorations, or rent a professional frame). No surprises on wedding day. Source: Home Depot (sandbags in the contractor section, usually $8–$12 each).
6. Stability in Wind or Crowded Spaces
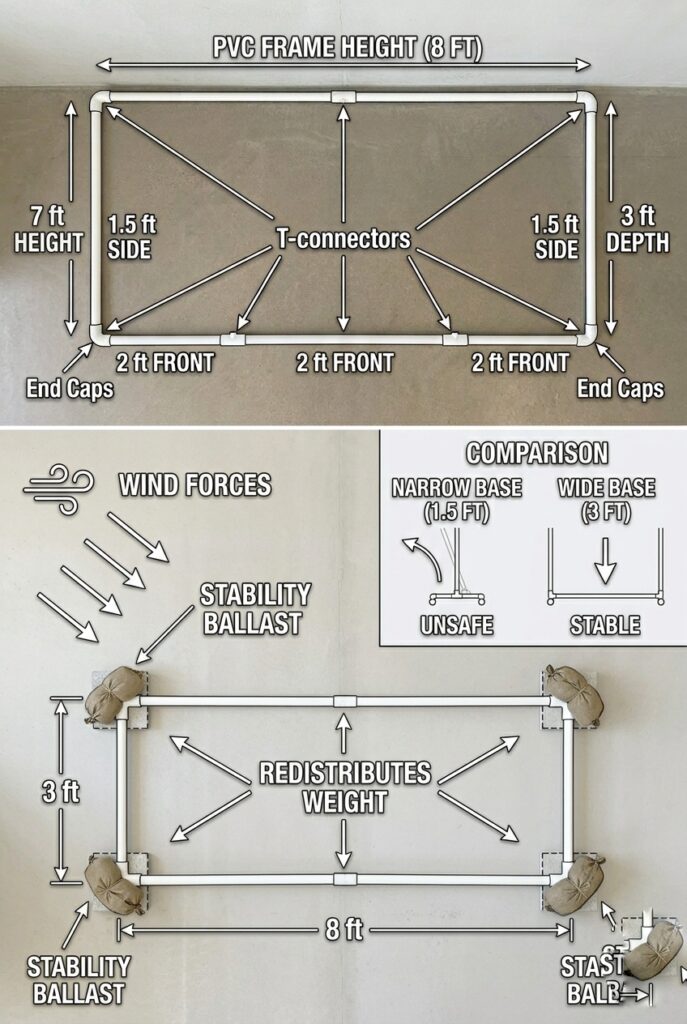
The single most common reason DIY backdrops fail is a base that is too narrow — an 8-foot-tall frame needs a base at least 3 feet deep on each side to prevent tipping, and for outdoor venues or any space with guest foot traffic near the back of the structure, sandbags or concrete footers weighing the base corners down are non-negotiable.
Test outdoor stability by having two people push the frame gently from different angles before any decoration is attached — it should not move at all under that pressure, and if it does, the base is either too narrow or unweighted. This stability principle carries through every outdoor element in your ceremony setup, and the DIY wedding decor guide covers wind-proofing and anchoring across all exterior DIY installations.
7. Assembly Day: Timeline and Troubleshooting
Three days before the wedding: assemble the fully decorated frame at home, test stability, photograph from the guest distance you will have at the venue, and make any adjustments with time to buy replacement materials if anything is wrong.
Two days before: disassemble carefully, label every pipe with painter’s tape (“top bar,” “left vertical,” “base front left”), and pack in labelled boxes; on the wedding day allow two hours minimum for reassembly and decoration with a second person helping, assembling in order — base first, verticals, top bar, clamps, fabric, decoration — and never attempting solo in under 90 minutes. For how this assembly timeline fits inside the wedding backdrop ideas framework of what each backdrop type actually demands on the day, that guide covers setup time, teardown, and what to negotiate with your venue coordinator in advance.
8. Decoration: Less is More (and Costs Less Too)
A fabric backdrop with garland along the top horizontal bar only, and optional string lights for an evening ceremony, reads as more considered and more expensive than the same frame covered in flowers on every surface — restraint signals design intention, while abundance signals covering a structural problem.
The practical build at this level — PVC frame, canvas fabric, clamps, one garland, and lights — runs $200–$350 total and photographs more cleanly than a $500–$900 over-decorated version, because the couple reads clearly against an uncluttered background. For the full breakdown of which materials stay within budget without sacrificing the professional appearance, the budget wedding decor guide covers the specific spend-versus-impact decisions that matter most.
Budget Hack #3: Buy grocery store flowers (roses, carnations, eucalyptus, $30–$50 for a bunch) and arrange them in clear glass vases placed on the ground in front of your backdrop, rather than trying to attach flowers to the frame itself. This costs $30–$50, looks intentional, and photographically frames your couple better than flowers scattered on the structure itself. You can move the vases, adjust them for photos, and reuse them for reception. Source: Trader Joe’s, Safeway, or Whole Foods (buy one day before wedding).
9. The Smart Alternative: Rent a Stand, DIY the Decoration
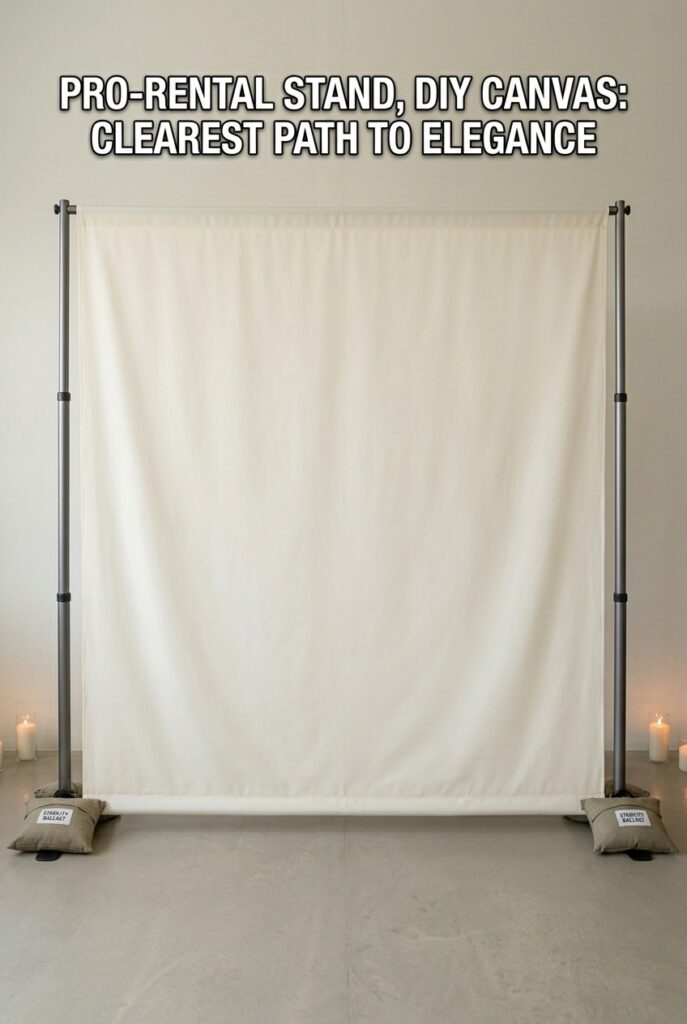
Here’s the reality: if you’re not confident in your building skills, renting a backdrop stand for $100–$250 and spending your DIY effort on fabric and dIf you lack tools, have never cut PVC before, or are uncertain about structural integrity, renting a collapsible backdrop stand for $75–$200 from an event rental company and spending your time only on the fabric and decoration eliminates all structural risk for $100–$150 more than the full DIY route.
Call three local event rental companies and ask specifically about basic backdrop stands — most carry them at $75–$200 with delivery and pickup included — then add your own canvas fabric, garland, and lights for $100–$250, bringing the total to $175–$450 with zero possibility of a structural failure on the day itself. This is the approach that works best alongside a ceremony backdrop design that prioritises a specific visual outcome over the process of building the frame.
10. Post-Wedding: Reusing Your Backdrop (Save Money Next Time)
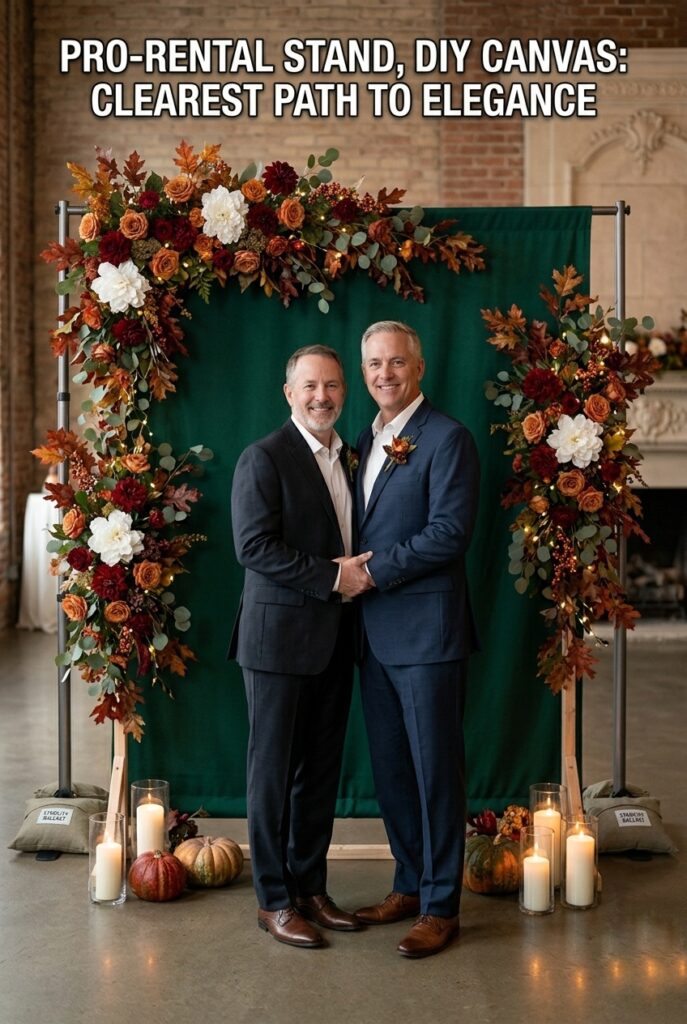
A well-built PVC frame stored disassembled in a labelled weatherproof container is reusable for anniversary photos, engagement sessions, baby showers, and any future event — the initial investment amortises across every additional use, and a second use effectively halves the per-event cost.
If you have no future events planned, sell the assembled and photographed frame to another couple through wedding resale groups for $50–$150, which brings your total out-of-pocket cost on the backdrop down to under $100 for the full wedding use.
Structure is where DIY backdrops succeed or fail — not decoration. Get the base depth right, use one-inch pipe minimum, and test the fully loaded frame three full days before the wedding. Everything else adjusts easily once the structure is confirmed.
For how your backdrop integrates into the full ceremony room design, the indoor wedding decor guide covers the full spatial picture including where the backdrop sits relative to guest seating, lighting, and the aisle.