
The heels you fall in love with at the bridal boutique at 10am will feel like instruments of torture by 7pm — not because you chose wrong, but because nobody told you feet swell a full half-size or more over the course of a wedding day.
That single piece of information changes every decision that follows.
This guide is about the structural choices — heel type, width, strap placement, insole depth — that let you stay in your shoes all the way through the last dance without calculating how far you are from your bag.
1. Block Heels — The Most Forgiving Structure Available

A block heel distributes your weight across a wider base than a stiletto — which means less pressure on any single point of your foot across hours of standing.
The structural difference is significant: a stiletto concentrates your body weight onto roughly one square centimeter of heel; a block heel spreads it across five to eight square centimeters.
For a day involving a 20-minute ceremony, a cocktail hour of standing and greeting, and a 3-hour reception, that pressure distribution is the difference between manageable and excruciating.
Look for block heels in the 2–3 inch range from Bella Belle Shoes, whose entire bridal line is engineered with padded insoles and a wider heel base.
Their Rosy block heel in ivory satin runs $188 and has been reviewed by hundreds of brides as genuinely all-day wearable.
Also worth looking at: the Dolce Vita Nandy, which runs $130–$150 at Nordstrom and gets consistent high marks for cushioning.
2. Platform Heels — Height Without the Foot Angle

Here’s the thing about platforms that most articles gloss over: a 4-inch heel with a 1-inch front platform is biomechanically equivalent to a 3-inch heel with no platform — the pitch of your foot is the same.
The platform doesn’t add to discomfort; it subtracts from it.
This means brides who want height but can’t sustain a steep foot angle all day can go significantly taller in a platform heel than in a comparable stiletto.
Bella Belle’s Sienna platform in ivory ($225) and the Ted Baker Pebela platform heel ($195 at Nordstrom) are the two I’d point brides toward first.
Only do this if your venue has flat, smooth flooring — platforms with thick front soles catch on uneven pavement and stone surfaces in a way that’s genuinely trip-hazardous for an outdoor wedding.
3. Kitten Heels — The Practical Choice Nobody Respects Enough
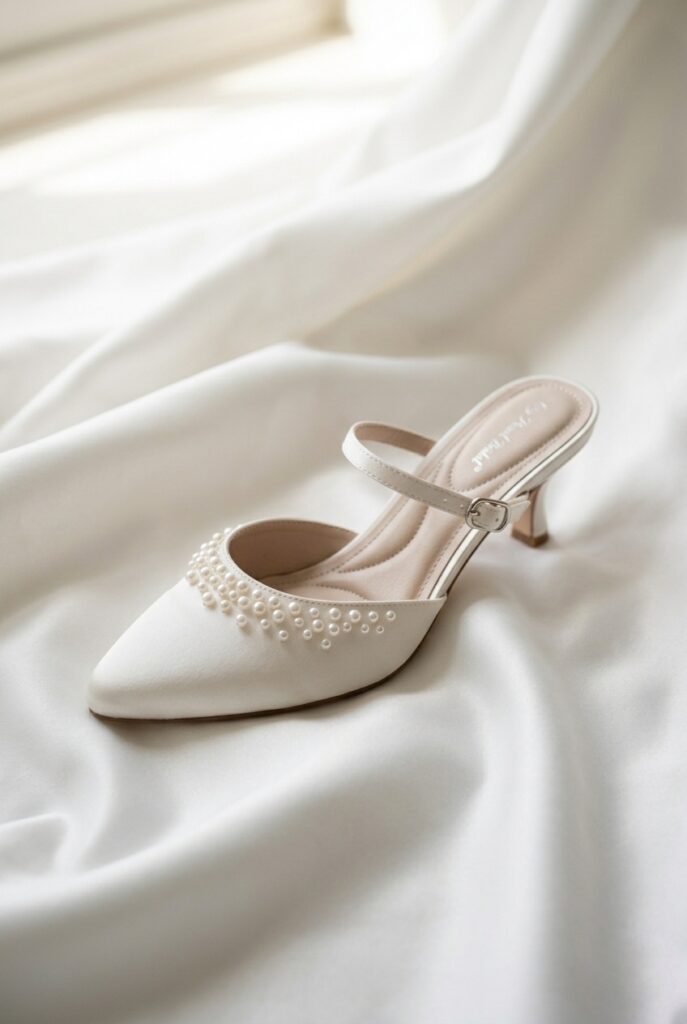
Kitten heels — 1 to 2 inches, narrow heel — are the most underrated comfort choice in bridal footwear and they photograph just as beautifully as a stiletto in full-length shots.
At that height, your foot sits at nearly its natural angle, which means almost zero arch strain across the day.
The bad version of this idea is a cheap, stiff kitten heel with no insole padding, which concentrates the impact at the ball of your foot with every step because the heel provides no real cushioning.
The good version is a kitten heel with a leather-lined footbed and some flexibility in the sole — the Loeffler Randall Elsie kitten heel in satin ($295) and the Sam Edelman Hazel pump ($90 at Nordstrom) both hit this.
If you’re not a regular heel-wearer and your wedding involves significant walking — a garden venue, a long aisle, a reception where you’ll be on your feet greeting 150 people — a kitten heel is not a compromise. It’s the correct decision.
💸 Budget Hack #1: The Dream Pairs Women’s Chunk Low Heel Pump Sandal on Amazon runs $35–$48 and is the #1 bestseller in Women’s Heeled Sandals with over 15,000 reviews. The open toe, ankle strap, and padded insole hit every structural comfort marker podiatrists recommend. They come in ivory, champagne, and white. For brides working with a tight shoe budget, this is the pair that consistently punches above its price in real wedding wear. Order two weeks out, break them in for three sessions of 45 minutes each before the wedding, and they will outperform a $200 heel that wasn’t designed with all-day wear in mind.
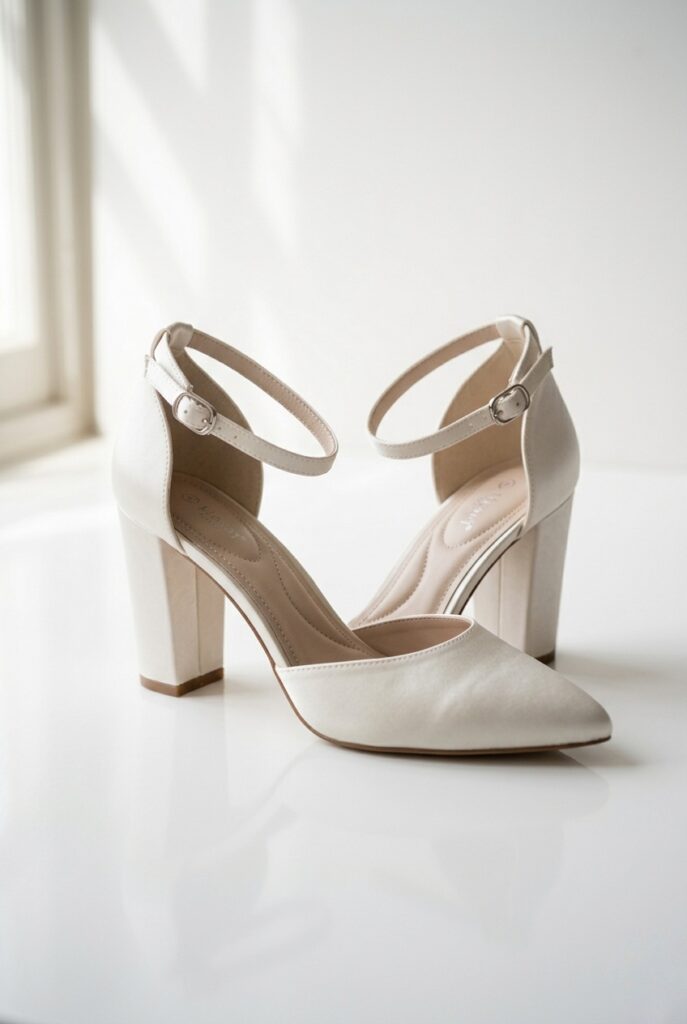
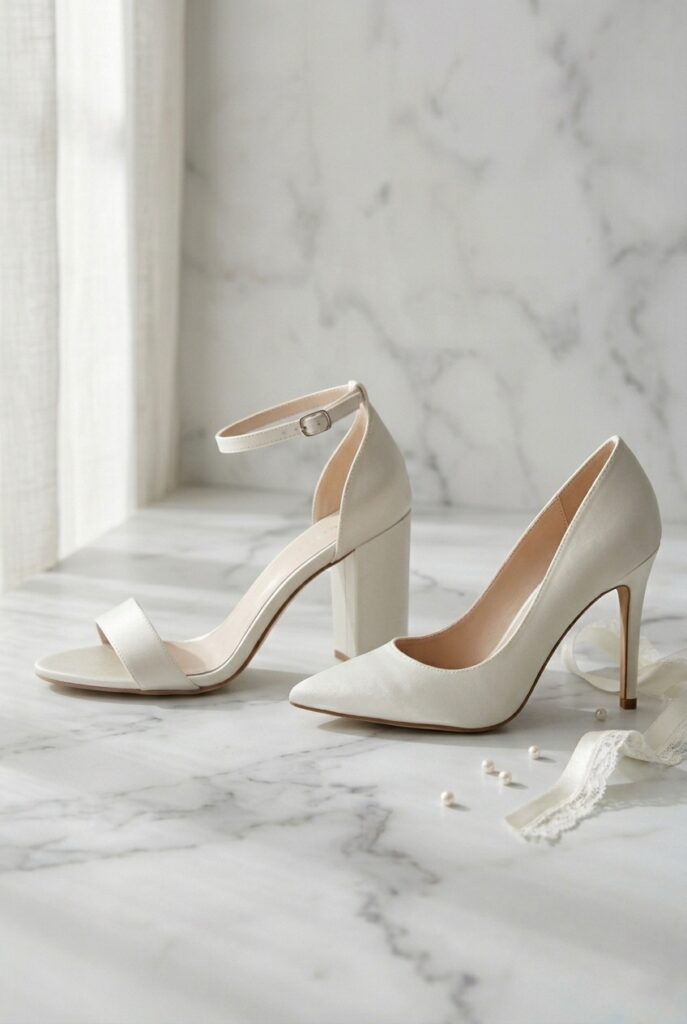
4. Ankle Strap Heels — The Structural Anchor Most Brides Skip

An ankle strap keeps the shoe anchored to your foot, which eliminates the micro-adjustment your foot muscles make constantly when a shoe is slipping.
That constant gripping is one of the primary causes of calf and arch fatigue in heels worn for hours — you’re working harder than you should be just to keep the shoe on. Bella Belle brides call their ankle-strap styles “a seatbelt for my feet,” and that’s accurate.
The specific detail to check: the strap should be adjustable with multiple buckle positions, not a fixed loop. By the end of a long wedding day, feet swell — a fixed strap that fit in the morning will feel tourniquet-tight by dinner.
Look for the Sarah Flint Perfect Block Sandal ($435) if budget allows — it’s built with anatomical arch support baked into the footbed, not added as an afterthought.
The Steve Madden Slinky sandal ($90 at Nordstrom) is the budget-accessible version with the same structural principle.
This is non-negotiable for outdoor venue weddings where uneven terrain makes every step a small stability test.
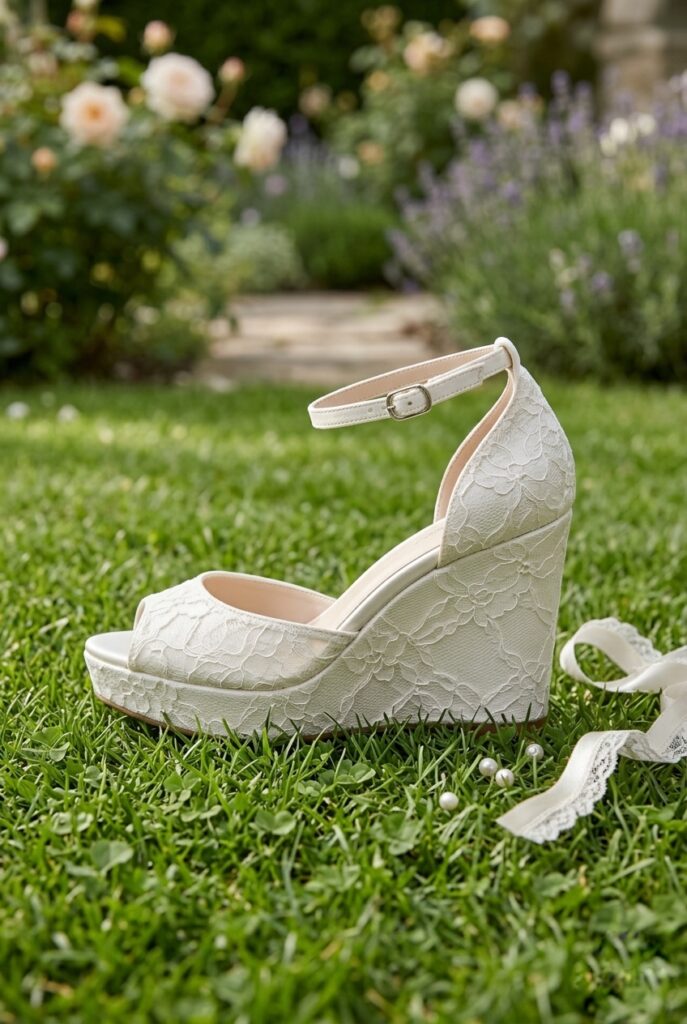
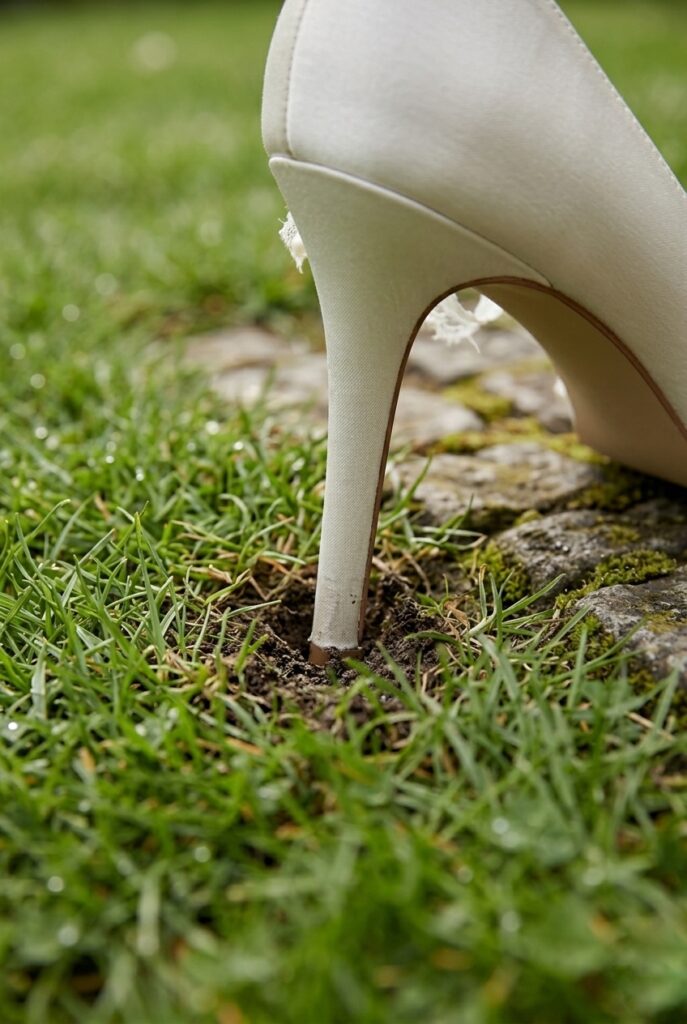
5. Wedge Heels — The Only Heel for Grass, Gravel, and Sand

Bold opinion: any bride having an outdoor wedding on grass, gravel, sand, or soft earth who chooses a stiletto or narrow block heel is making an expensive mistake that no one around her will correct before it happens.
Narrow heels sink into soft ground — a stiletto will disappear into lawn turf up to an inch on a warm day — and every step becomes a posture battle.
A wedge heel’s full-length sole distributes weight across the entire bottom of the shoe, making it physically impossible to sink. It’s also the only heel type that provides true ankle stability on uneven terrain.
For backyard weddings, beach ceremonies, and garden venues, the wedge is not a stylistic choice — it’s a structural requirement. Badgley Mischka makes several bridal wedges in the $120–$180 range at Nordstrom.
The Naturalizer Adia wedge sandal ($89) is less overtly bridal but photographs beautifully in ivory and champagne. Skip pointed-toe wedges — the lack of toe box flexibility defeats the purpose.
6. The Heel Height Decision — Be Honest About Your History

Your wedding day is not the occasion to debut a heel height you’ve never sustained for more than two hours.
I’ve watched brides attempt 4-inch stilettos for the first time at their own wedding and the pattern is consistent: they look composed for the ceremony, uncomfortable during cocktail hour, and visibly pained by the reception toasts.
The rule is simple and podiatrist-endorsed: if you don’t wear a given heel height regularly in everyday life, stay at least one inch below it for your wedding.
Regular 3-inch heel wearer? Max out at 3. Never worn heels? 1.5 inches is your ceiling.
The Knot’s editorial team, who tested dozens of brands, consistently flag heel height as the single variable brides get most wrong — specifically by choosing a height that photographs well rather than one they can genuinely sustain.
Use their comfortable wedding shoe guide to benchmark specific brands against your height comfort threshold before buying.
💸 Budget Hack #2: Buy a $12–$18 pair of Vivian Lou Insolia heel inserts from Amazon before you buy your wedding shoes. Insolia inserts shift your body weight from the ball of your foot back toward your arch — the biomechanically correct weight distribution for sustained heel wearing. Test them in a pair of heels you already own for a full evening before shoe shopping. If they make your existing heels bearable for three hours, they’ll make your wedding heels last the full day. Order two pairs: one for your shoes, one as backup if the adhesive shifts. This $15 investment changes what heel heights are accessible to you.
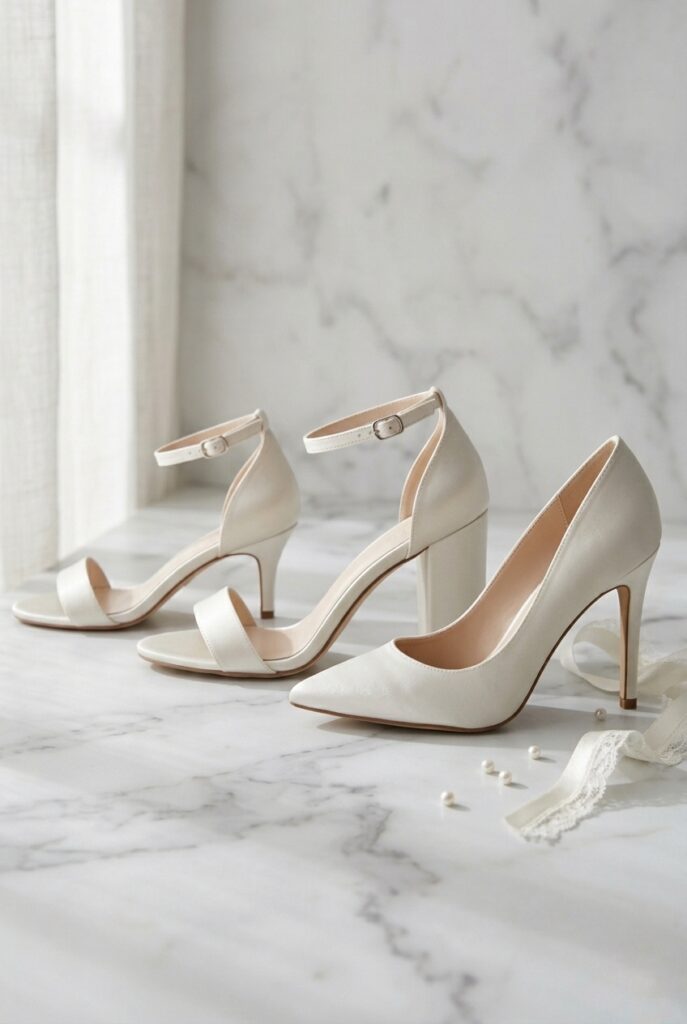
7. Toe Box Shape — The Detail That Causes Blisters, Not the Heel

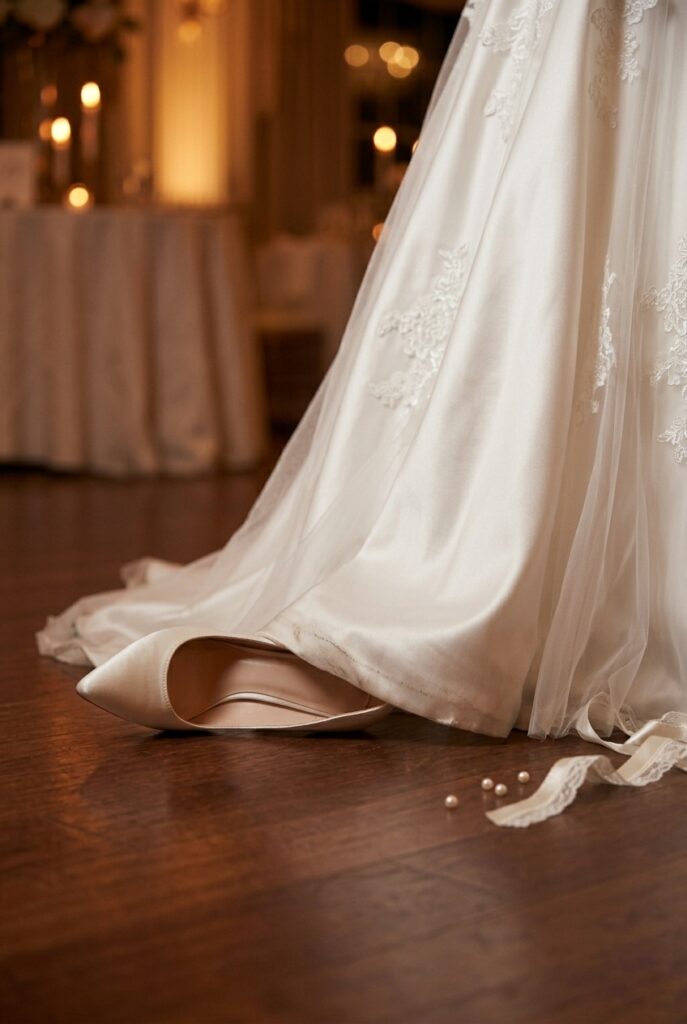
Pointed-toe shoes push all five toes into a converging space, which causes lateral toe compression — the source of the blisters and pinching most brides attribute to “the heel.” It’s not the heel. It’s the box.
Celebrity podiatrist Marion Yau recommends open-toe or round/square-toe silhouettes specifically for extended wear, because they allow the toes to flex naturally during walking rather than pressing against a rigid sidewall.
This is the Gap Idea that no bridal shoe guide connects clearly: if you need a pointed toe for aesthetic reasons, your shoe should be at least a half-size larger than your measured size to allow toe breathing room — especially accounting for afternoon swelling.
Round and square toe boxes in bridal heels have become significantly more available: the Badgley Mischka Reggie block heel pump ($150) and the Steve Madden Vanya square-toe mule ($80) are both widely stocked in ivory and champagne.
8. The Foot Swelling Timeline — Shop Accordingly (Gap Idea 1)

Feet swell. Every podiatrist will tell you this, but no bridal shoe guide applies it specifically to wedding logistics.
Here is the timeline: feet reach their smallest volume in the morning, swell steadily through the day as you stand and walk, and are typically at maximum volume by late afternoon — often a full half-size larger than your morning measurement.
This means: if you buy shoes in the morning and they fit precisely, they will feel tight by 4pm. If you try on shoes in the afternoon and they fit with a small amount of give — enough that you might ordinarily size down — they are the correct size for your wedding day.
Shop for wedding shoes between 2pm and 6pm, not at a morning appointment.
This one shift in timing saves brides from the most common sizing mistake in bridal footwear.
Also: choose styles with adjustable straps over slip-ons wherever possible, because adjustable straps accommodate swelling in a way that a fixed-fit pump cannot.
9. The Venue Floor Test — Match Your Heel to Your Surface (Gap Idea 2)

This is the insight competitors miss entirely: the right heel depends on your floor, not your preference. Smooth hardwood ballroom floor?
A stiletto is actually more stable than a thick rubber-soled block heel because the thin tip grips the wood grain rather than sliding.
Polished marble or stone tile? A wider heel or platform is safer — stilettos can skip across high-gloss stone.
Concrete courtyard or brick pathway? Mid-block heel or wedge; narrow heels catch in mortar gaps. Grass or soft earth? Wedge only, non-negotiable.
Carpet? Almost any heel works. Before buying your wedding shoes, request photos or visit your venue to identify the flooring material in both your ceremony and reception spaces.
For a summer outdoor wedding, grass is almost always part of the equation somewhere — build your shoe choice around that.
10. Breaking In Your Shoes — The Method That Actually Works
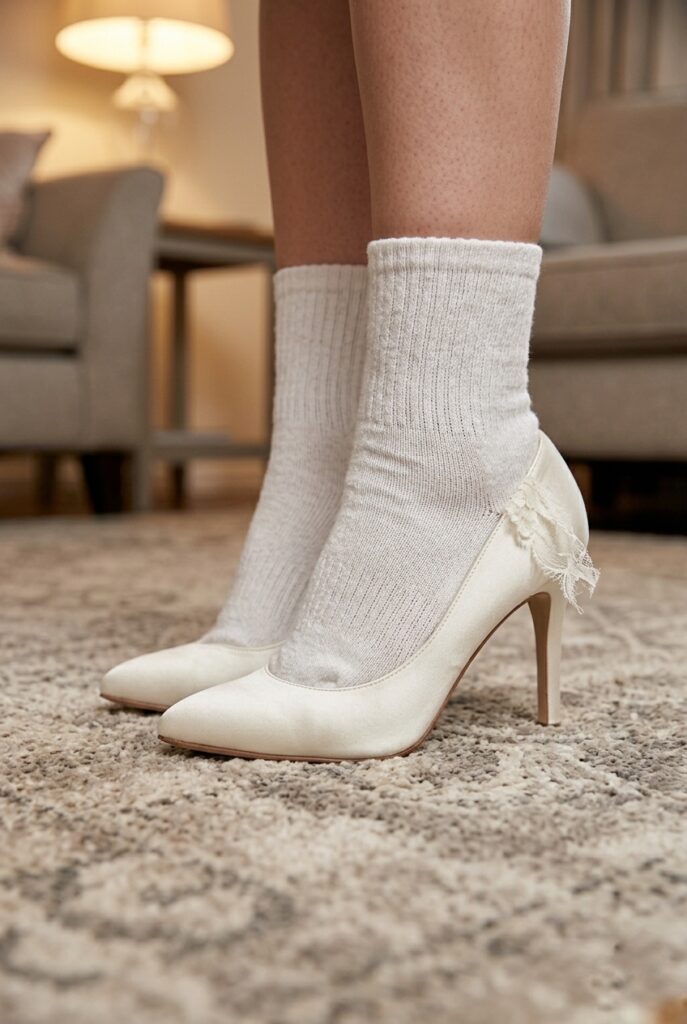
Almost every competitor says “break in your shoes before the wedding” and stops there.
Here is the specific protocol that actually works: wear your wedding shoes indoors with thick cotton socks for two 45-minute sessions on carpet before the wedding.
The sock thickness gently stretches the shoe’s upper material to the shape of your foot, and the carpet prevents sole damage.
On the third session, switch to wearing them on a hard floor without socks for 30 minutes to confirm fit.
Do this at least two weeks before the wedding. If they cause any pinching or hot spots during the indoor sessions, take them to a cobbler for a professional stretch ($15–$25) — a cobbler can spot-stretch specific pressure points with a shoe stretcher, which is far more precise than wearing them in and hoping.
Do not break in wedding shoes on pavement or outdoor surfaces before the wedding — the soles will scuff and the heel tips will wear down.
Heel tips are replaceable at any cobbler for $10–$20 if they show wear, but prevention is easier.
💸 Budget Hack #3: Heel stoppers — small rubber caps that slip over stiletto heel tips — cost $8–$15 on Amazon for a pack of 12 and prevent stiletto heels from sinking into soft ground, clicking on hard floors, and wearing down prematurely. For brides who love a stiletto but have any outdoor transition in their wedding day (walking to a car, a garden photo location, a path to the venue), heel stoppers are the $10 purchase that extends the viability of that heel choice significantly. They’re not visible in photos, they’re easy to remove when you’re back on a hard floor, and they have saved more than a few ceremonies from an ankle-wobble mid-aisle.
Decision Filter
If your ceremony and reception are entirely indoors on smooth flooring, you have the most options: block heel, platform, kitten, or stiletto with a round toe box all work. If any portion of your day involves walking on grass, gravel, sand, or uneven outdoor surface, wedge or a wide platform is your only structurally safe choice — everything else is a genuine fall risk. If you’re not a regular heel-wearer, stay at or below 2 inches and prioritize an ankle strap. If budget is your primary constraint, the Dream Pairs Amazon option combined with Viviani Lou Insolia inserts is the most cost-efficient path to a genuinely comfortable heel. For budget-friendly elegant wedding aesthetics, this combination costs under $65 total and performs better than most $200 bridal shoes without arch support.
The Real Reason
Most brides pick uncomfortable shoes because every shoe in every bridal boutique is photographed and displayed at an angle that obscures the footbed and the insole — the two things that determine whether the shoe is wearable for eight hours.
The display highlights the embellishment, the heel silhouette, the fabric.
The insole, which is where your foot actually lives, gets no attention until you’re in pain.
The contrarian insight: a plain block heel with a deeply cushioned footbed will outlast a beautiful embellished stiletto in every practical metric except looking good in a flat-lay photo.
Here’s what photographers and coordinators know that nobody tells brides: the shoes are almost never visible in ceremony photos beyond the first few minutes.
The flower girl shot, the first look, the walk down the aisle — those are the moments your shoes appear prominently. After that, they’re under a dress for the rest of the day.
Choose the shoe that gets you through the whole day, not the one that photographs best for the first twenty minutes.
Mistakes to Avoid
Mistake 1: Trusting the backup flat strategy as a comfort plan. Every competitor recommends packing a backup pair of flats. Here’s the problem: by the time a bride’s feet hurt badly enough to switch shoes, they’ve been in pain for 30–60 minutes already, and foot muscles in distress don’t recover by changing shoes — they stay inflamed.
Switching to flats at that point provides only marginal relief. The correct strategy is choosing a first shoe you can sustain all day, not planning an escape from a bad first shoe.
A backup pair is fine as a contingency — but building your shoe plan around needing to switch is planning to fail.
Mistake 2: Buying shoes at a morning appointment. This is the most expensive single mistake in bridal shoe shopping and it costs brides money directly.
Feet at 10am are at their smallest.
Shoes purchased in the morning to a precise fit will be uncomfortably tight by 4pm.
Brides spend $150–$400 on shoes that feel perfect at purchase and cause enough pain on the day that they’re removed by cocktail hour.
Schedule your bridal shoe appointment between 2pm and 5pm, when your feet are at their representative wedding-day size, and size with a small amount of give rather than a precise fit.
Mistake 3: Ignoring the heel tip condition on the day. Worn-down heel tips — the small plastic or rubber caps on the bottom of the heel — are the most common cause of slipping and instability in wedding heels, and almost no bride checks them before the wedding.
If you’ve been breaking in your shoes for two weeks, check the heel tips 48 hours before the wedding. If they’re worn down to the metal nail beneath, a cobbler can replace them same-day for $10–$20.
Walking down the aisle on a metal nail instead of a rubber heel tip is genuinely dangerous on any smooth surface — it’s the difference between grip and skating.
Mistake 4: Choosing shoes based on how they look on other brides’ feet. Your foot shape, arch height, and instep width determine which shoe styles are structurally compatible with your anatomy — not which ones look good on another bride.
A bride with a high instep in a low-vamp slip-on pump will fight that shoe for hours.
A bride with a wide toe box in a narrow pointed-toe heel is in pain from the first hour.
Try on shoes in the afternoon with the foot in the condition it will be during the wedding, and trust how they feel in a 20-minute walk, not how they look while standing still.
Bella Belle’s Shoe Concierge is a genuinely useful free resource for brides who can’t find a stock style that fits their foot anatomy — they’ll map your foot profile to their construction.
FAQ
What type of heel is most comfortable for a wedding?
Block heels and platforms are the most comfortable heel types for extended wedding wear.
They distribute weight evenly across a wider base, reduce pressure on the ball of the foot, and provide more ankle stability than stilettos.
For outdoor venues, a wedge is the only structurally sound choice.
How high should bridal heels be for all-day comfort?
Stay at or below the heel height you wear comfortably for three or more hours in everyday life. If you rarely wear heels, 1–2 inches is your practical ceiling.
Podiatrists recommend no higher than 3 inches for extended all-day wear, as taller heels place increasing stress on the forefoot and metatarsal bones with every hour of standing.
Should I size up for wedding heels?
Yes — size up half a size from your standard morning measurement, and shop in the afternoon when your feet are at their natural swollen-from-day-use size.
Wedding days involve hours of standing, which causes feet to swell significantly. A shoe that fits precisely in the morning will feel tight by the reception.
Are bridal heels worth the expense compared to regular heels?
Not automatically. Expensive bridal heels are often sold on aesthetics — the fabric, the embellishment — rather than footbed engineering.
A $90 block heel from a comfort-focused brand with a cushioned insole will outperform a $400 bridal pump with minimal footbed support.
Check for padded insoles, anatomical arch support, and flexible outsoles regardless of price point.
Budget Table
| Heel Style | Price Range | Best For | Venue Surface | Comfort Level |
|---|---|---|---|---|
| Block heel pump | $90–$250 | Indoor/outdoor ceremonies | Carpet, wood, concrete | ★★★★★ |
| Platform heel | $130–$280 | Indoor formal venues | Smooth floors only | ★★★★☆ |
| Kitten heel | $85–$295 | All-day wear, non-heel-wearers | Any surface | ★★★★★ |
| Ankle strap sandal | $90–$435 | Outdoor + all-day | Varied terrain | ★★★★★ |
| Wedge heel | $89–$200 | Outdoor: grass, gravel, beach | All outdoor surfaces | ★★★★★ |
| Stiletto | $120–$400 | Short-wear, indoor only | Hardwood, carpet | ★★☆☆☆ |
| Low block sandal (Amazon) | $35–$48 | Budget, all-day | Indoor + light outdoor | ★★★★☆ |
One Last Thing to Do Before You Buy
Your feet are going to carry you through one of the most physically demanding days of your life — more standing, more walking, more unexpected surface changes than you’ve planned for.
The heel you choose should be chosen the way you’d choose running shoes for a race: by how it performs across the full distance, not by how it looks at the starting line.
Buy your shoes in the afternoon, size for swelling, match the heel to your venue surface, and break them in with the sock method before the day arrives.
Then read through the outdoor wedding decor ideas on this site to see exactly which venue types require which heel decisions before you finalize anything.
