Every DIY bridal shower tutorial looks easy in the video — clean hands, perfect lighting, pre-cut materials, and a four-minute result.
The honest version covers what actually takes longer, what fails without warning, and what you can skip entirely without anyone noticing.
1. The Floral Hoop Centerpiece — 45 Minutes
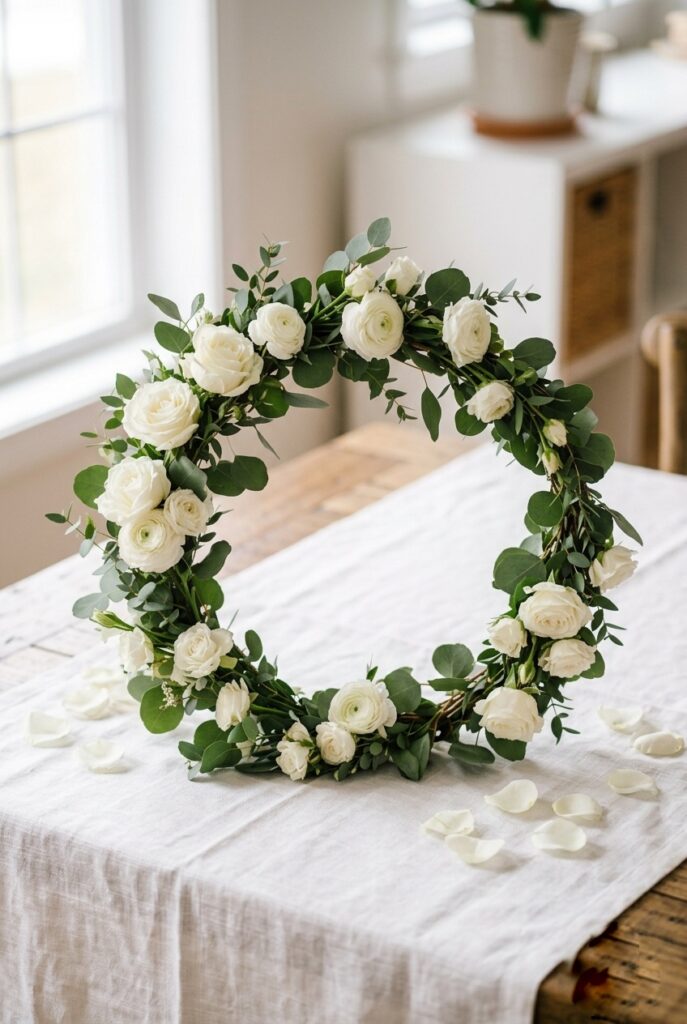
A 12-inch foam ring from Amazon at $6–$9 for a pack of three, two bunches of white spray roses or alstroemeria from Trader Joe’s at $4–$6 per bunch, and eucalyptus snipped short and pressed tightly into the foam so no base shows — that is the complete materials list, and the only technique variable that determines whether it reads as a florist’s work or a craft project is density.
Set it flat as a table centerpiece or hang it vertically from a ribbon as a backdrop accent — make it two to three days before the shower so the flowers have time to settle — and for how a floral hoop interacts with other centerpiece elements on the same table, the bridal shower centerpiece guide covers scale, vessel mixing, and the placement principles that make a single hoop anchor the whole table rather than competing with it.
2. Chalkboard Welcome Sign — 20 Minutes, Zero Craft Skill Required
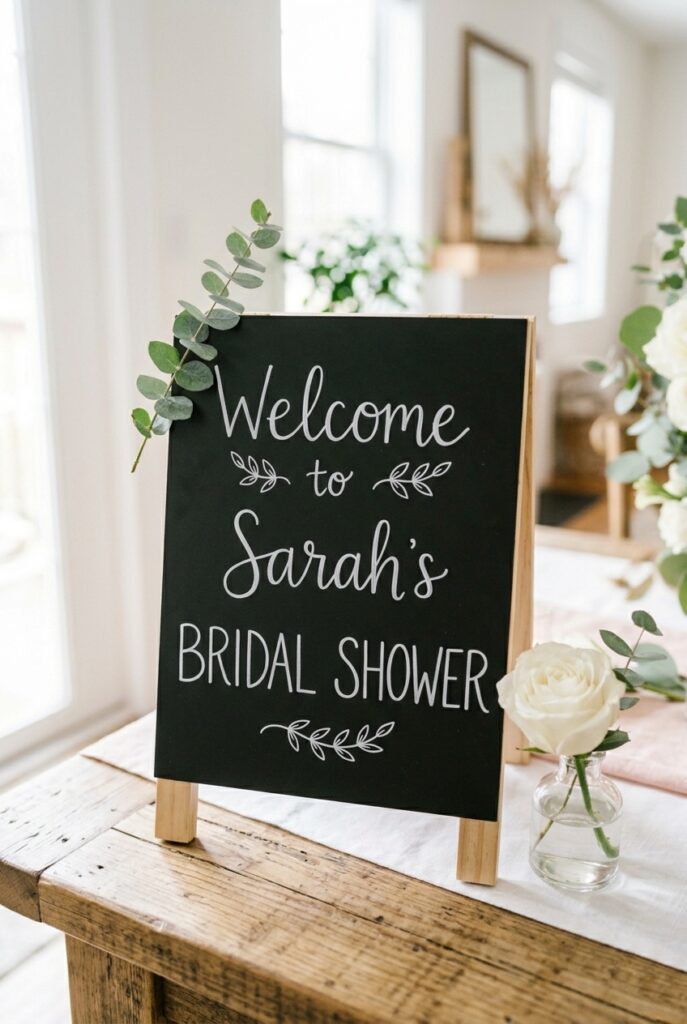
A chalkboard welcome sign requires no calligraphy skill — print your desired text at the right font size on regular paper, tape it to the chalkboard, and trace the outlines through the paper with a toothpick to create dot guides, then fill in with a chalk pen for clean lines that don’t smear.
A $12–$18 chalkboard from Amazon or a craft store, chalk pens rather than regular chalk, and a small easel at $8–$12 produces a result that reads as practiced and intentional — and for how this DIY approach fits within the complete sign suite from welcome through to food labels and bar signs, the bridal shower welcome sign guide covers every format and what to do differently if you want a larger-format sign than a standard chalkboard provides.
3. Fabric Photo Backdrop — 60 Minutes, Easiest Installation of Any Backdrop Option
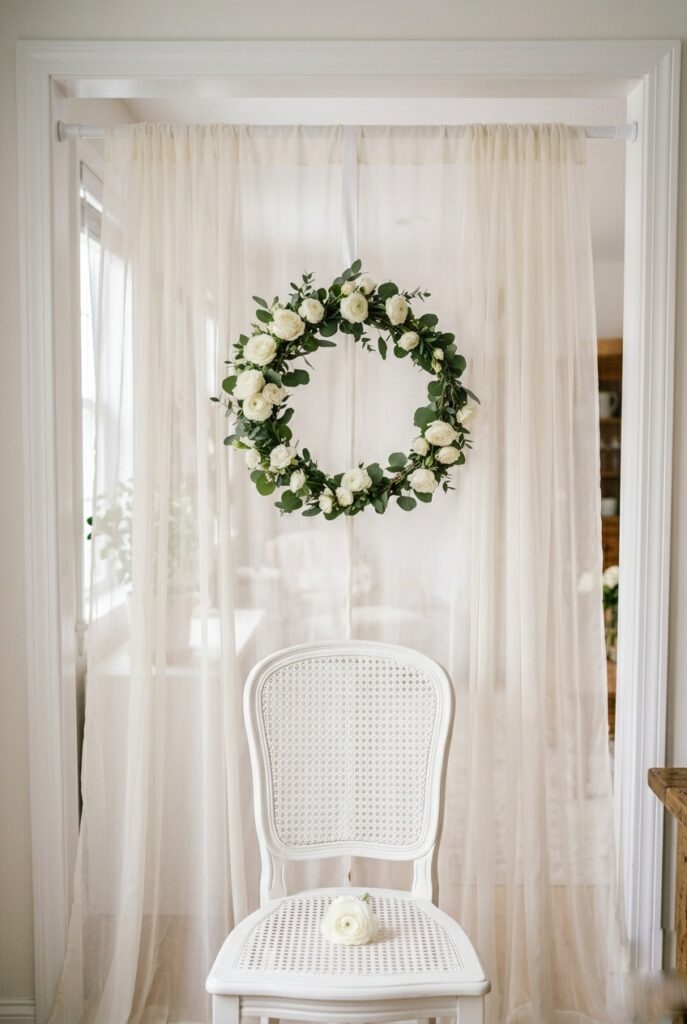
Two sheer white or ivory curtain panels in the 84-inch length hung from a tension rod fitted to a doorframe — $8–$15 for the rod, $12–$25 per panel at IKEA or Amazon — is the complete installation, and fabric always photographs better than paper, streamers, or plastic because it has texture and drape that catches light rather than reflecting it flat.
Center either your floral hoop from Idea 1 hung at eye level on a ribbon, or a single cluster of pampas grass in a floor vase placed in front, and the result reads as professionally installed — skip it entirely if your venue has beautiful architectural walls, exposed brick, or painted wood shiplap, which are already better backdrops than anything you can hang in front of them, and the bridal shower backdrop ideas guide covers which backdrop formats work best for each venue type.
💸 Budget Hack #1: IKEA LILL sheer curtain panels cost $3.99 per pair — two pairs give you a full, layered backdrop for under $8 in fabric. Add a $7 tension rod and your floral hoop and the whole backdrop installation costs under $20. This is the same visual effect party rental companies charge $80–$150 to install. The only difference is you’re putting it up yourself, which takes 15 minutes with a tension rod and zero tools.
4. Organic Balloon Garland — 90 Minutes, Worth Every Minute
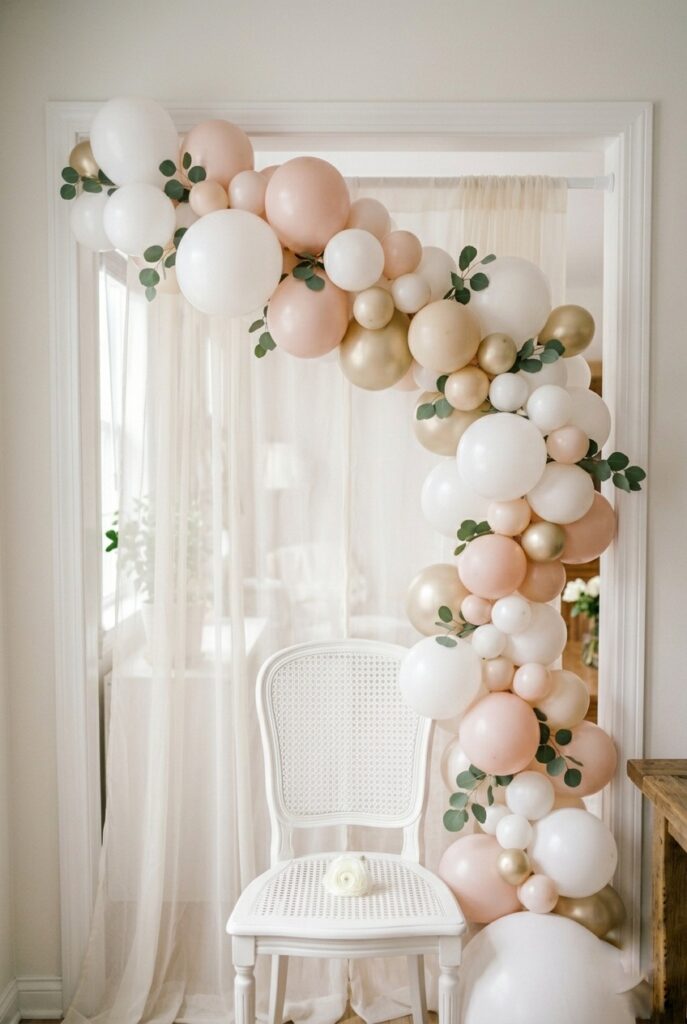
The honest estimate for your first balloon garland is two to three hours — not the ninety minutes tutorials promise — but a well-executed garland in white, blush, and champagne gold at a doorframe or along a mantle is the single highest visual-impact element you can DIY for a bridal shower, and a kit from Amazon at $25–$40 with 100+ balloons and a strip gives you everything in one box.
The key variable no tutorial mentions: inflate balloons to mixed sizes from 5-inch to 11-inch, because uniform sizes produce a school-event arch while varied sizes produce an organic installation — and for the complete range of balloon styles and color palettes specific to bridal showers, the bridal shower balloons guide covers how garlands, arches, and organic clusters work differently and which one suits your space.
5. DIY Candle Votives with Dried Florals — 30 Minutes, No Glue Required
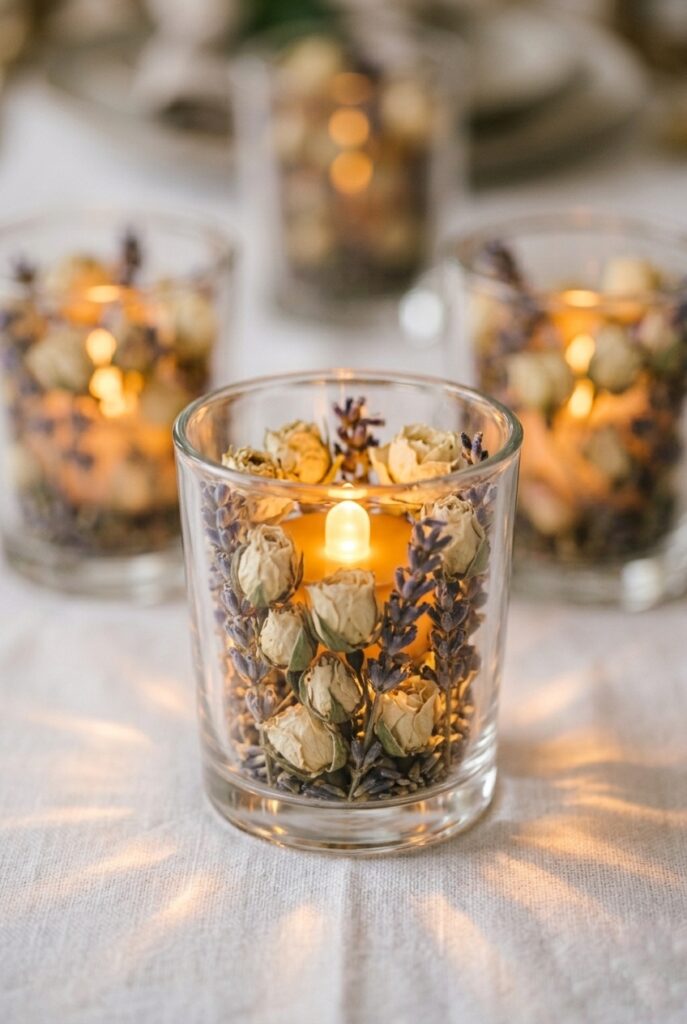
Clear glass votive holders at $1.25 each from Dollar Tree or $14–$18 for a 12-pack from Amazon, dried flower heads placed loosely inside around a battery tea light — no adhesive, no crafting — and the amber glow through the glass makes the result look like a styled floristry product rather than a weekend project.
Pack the dried material so the glass is mostly filled with botanical content and the tea light sits at the center, because the version with one dried flower head and three inches of empty space around it looks unfinished — and for showers that want the candlelit elevated atmosphere this creates across every table in the room, the elegant bridal shower guide covers how votives, taper candles, and overhead lighting work together as a complete lighting system.
6. Canva-Printed Table Signs and Menus — 15 Minutes Design, $0–$8 Print Cost
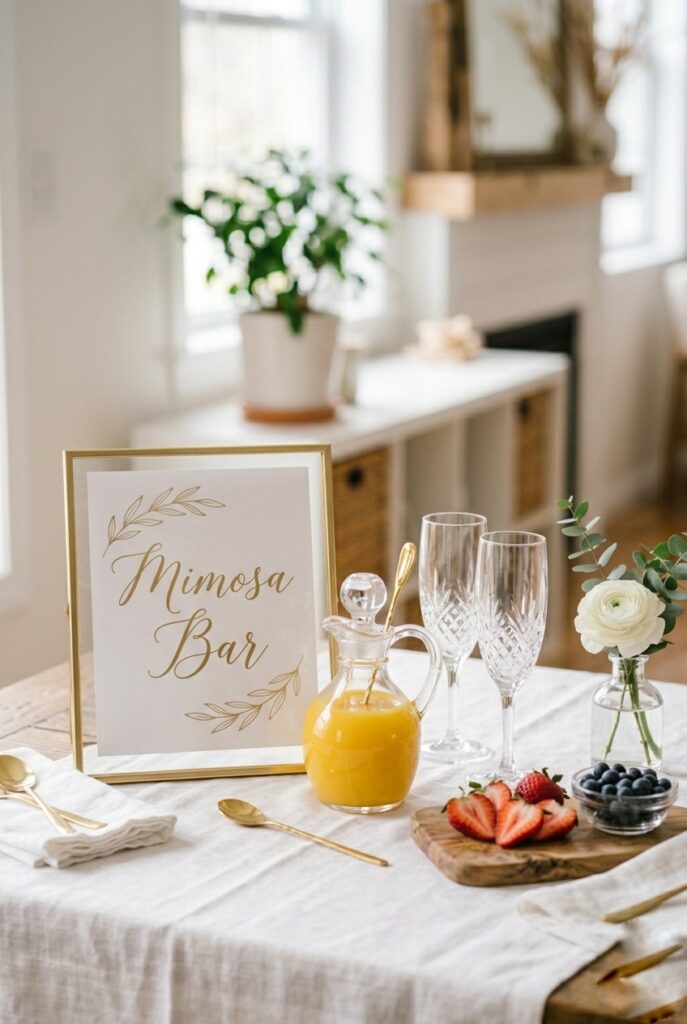
Canva has free bridal shower templates for table menus, bar signs, dessert table labels, and welcome signs — design your chosen set, download as a PDF, print at Walgreens or CVS for $0.25–$0.50 per 4×6 print, and slide into $3–$4 Target gold or white frames for a complete coordinated sign set across the dessert table, bar, and gift table for under $10 total.
The version that looks homemade is printing on regular copy paper at home, where stock paper weight buckles and home printer colors wash out — always use a photo lab or print service for any sign that goes in a frame — and the bridal shower signs guide covers how to build the full coordinated sign suite so all your Canva-designed pieces share the same visual system from welcome sign through to food labels.
💸 Budget Hack #2: Walgreens Photo prints 4×6 photos for $0.29 each and 5×7 prints for $0.99 — same-day pickup available. Design six coordinated signs in Canva using one free template (duplicate the layout, swap the text), order same-day at Walgreens, and pick up $3–$4 frames from the Dollar Tree. Total for six framed coordinated signs: under $12. This is significantly cheaper than ordering a pre-made party sign kit on Etsy ($18–$35) and gives you complete control over wording and font.
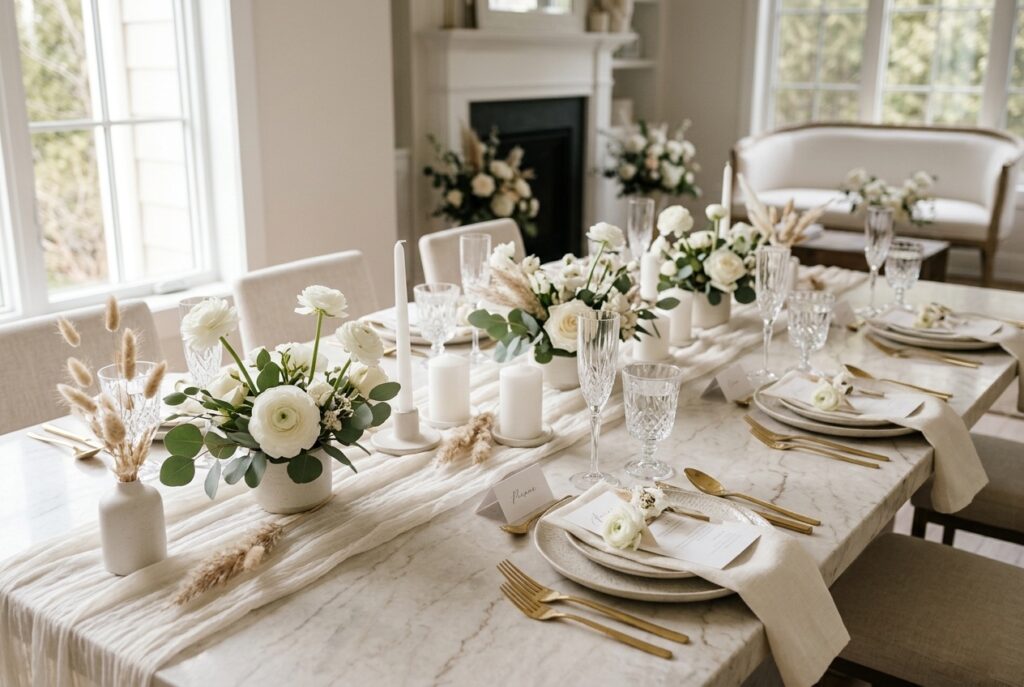
7. Linen Runner from Tea Towels — 10 Minutes Assembly, Zero Sewing

Four natural linen tea towels from IKEA at $3.99–$4.99 each, laid end-to-end down the center of a dining table, produce a linen runner with natural texture and visible weave that photographs as a $40–$60 specialty purchase — purchased tea towels have finished edges, which is the single detail that separates a surface that looks designed from one that looks like someone ran out of tablecloth.
The cheap wrong version is using uncut fabric from a craft store bolt, where the raw edge curls within an hour and reads as unfinished regardless of what you place on top — and for how the tea towel runner integrates with centrepieces, place settings, and candle placement as a complete table, the bridal shower table decor guide covers the full layered setup.
8. Paper Pom-Pom Ceiling Decor — Skip This Unless You Have an Extra Person
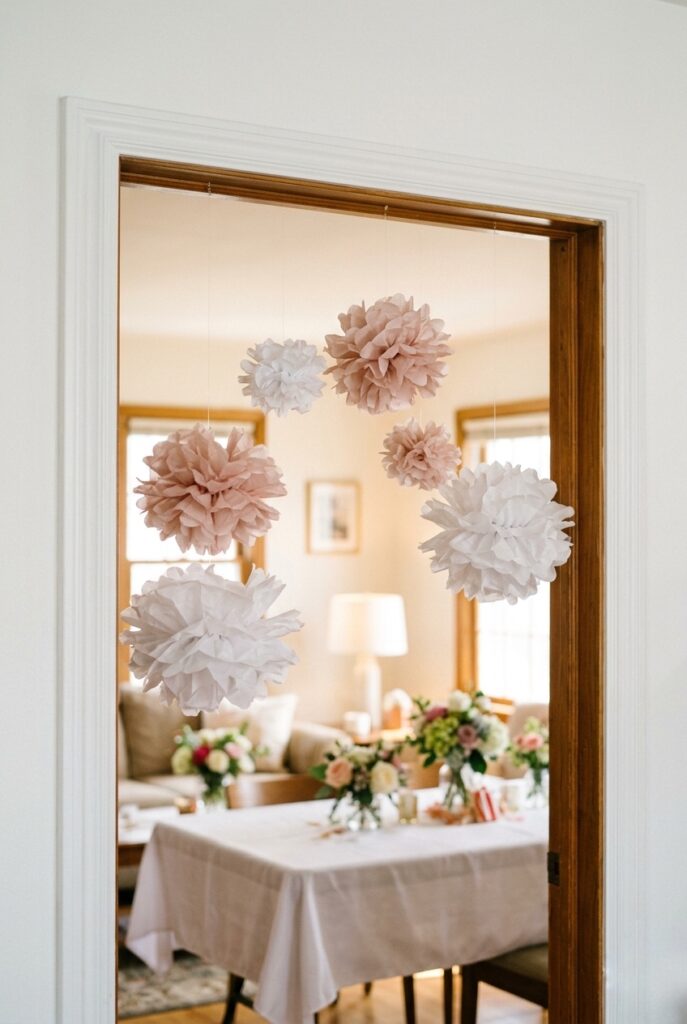
Tissue paper pom-poms require two people to open and fluff evenly — solo pom-poms collapse on one side and look like crushed flowers — but when hung correctly in a cluster of five at varying heights from a doorframe using clear fishing line, the ceiling moment reads as designed rather than draped.
Pre-made tissue pom-poms from Amazon at $14–$18 for a mixed-size pack of eight are indistinguishable from DIY ones and take four minutes to open instead of forty-five minutes to build — and if you want to understand how ceiling and overhead elements fit into a complete decoration plan alongside table and backdrop elements, the bridal shower decoration guide covers every layer from floor to ceiling in the right sequencing order.
9. Bud Vase Cluster Centerpiece — 15 Minutes, Genuinely Foolproof
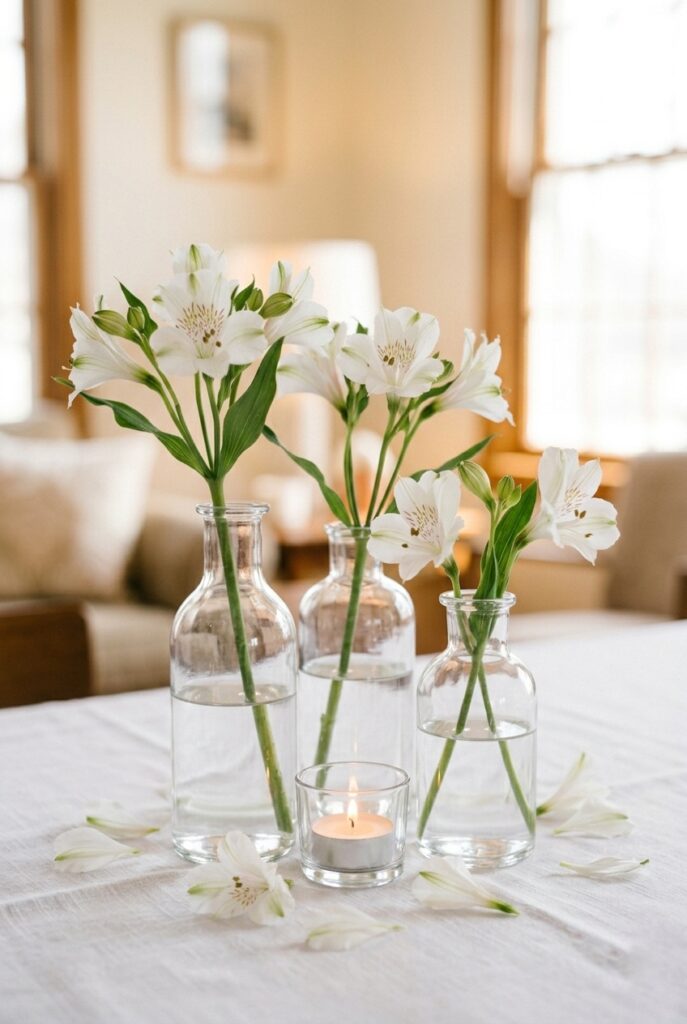
Three clear glass bud vases at varying heights, clustered tightly together with one tealight votive between them, and one bunch of white alstroemeria from Trader Joe’s at $3.99–$5.99 cut to three different lengths divided across the vases — that is a complete, intentional centerpiece for a total material cost under $20, including the vases.
One bud vase with two flowers reads as placeholder; three clustered vases read as arrangement — the number and tight grouping is the design, not the flowers — and for the full range of bridal shower flower choices that work at this scale by season and budget, the bridal shower flowers guide covers which stems hold in a vase for forty-eight-plus hours versus which ones need same-day sourcing.
💸 Budget Hack #3: Thrift stores and Facebook Marketplace consistently have mismatched clear glass bud vases and small glass vessels for $0.25–$1.00 each. A set of 15 varied clear glass vases sourced from Goodwill for $10 total looks more visually interesting than a matching set from Amazon — because the slight variations in glass shape and height read as curated rather than purchased. Search “clear glass vases” on Facebook Marketplace the week before your shower. Most listings are from people post-wedding who need to offload exactly what you’re looking for.
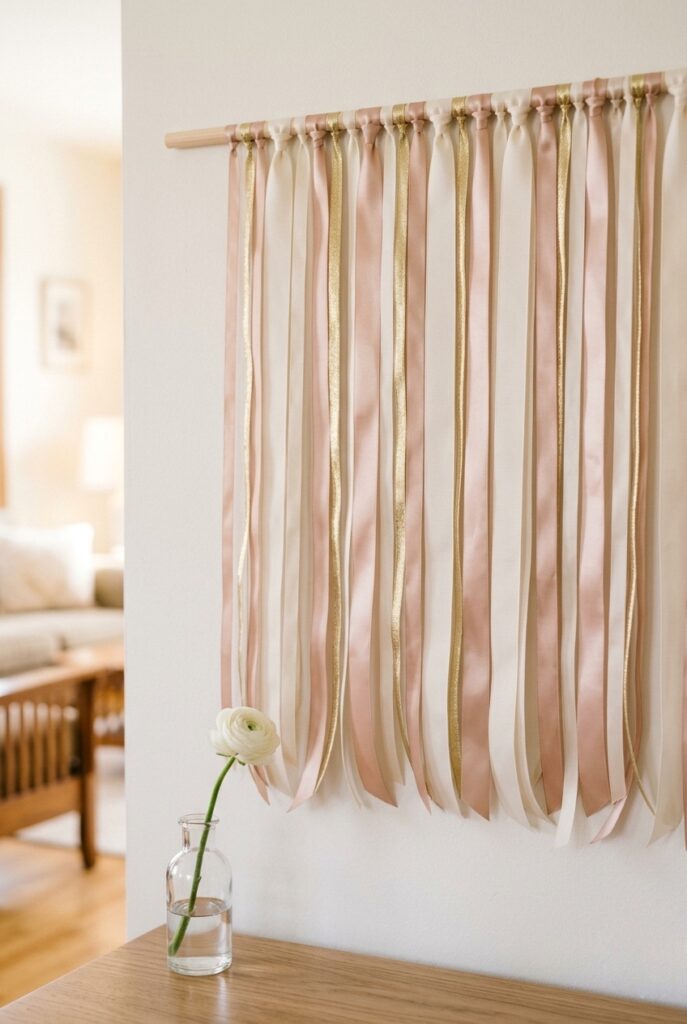
10. Ribbon Backdrop Fringe — 45 Minutes, High Visual Impact per Dollar
Three small gold frames with printed photos of the bride with her closest people — at varying heights using stacked books as risers — alongside a single white rose in a bud vase and a handwritten card from the host creates the most emotionally resonant moment of the entire shower, and the reason no one makes it is that it requires someone who knows the bride well enough to choose the right photos.
The setup costs under $15 in frames and one bunch of flowers, takes twenty minutes to arrange, and produces the element guests mention first when the bride asks what they remember about the shower — and for the gifts the bride receives at that same table and how to brief guests so the memory table has the right context alongside the gifts, the bridal shower gifts guide covers the complete gift table and receiving setup.
11. The Personalized Memory Table — 20 Minutes, Highest Emotional Return
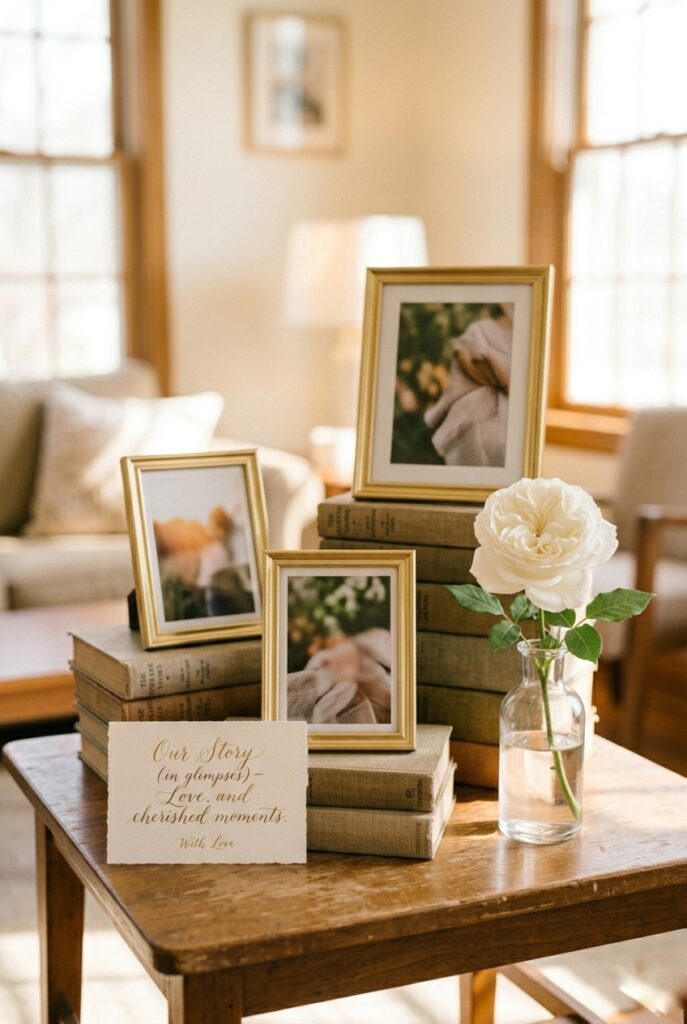
Three small gold frames with printed photos of the bride with her closest people — at varying heights using stacked books as risers — alongside a single white rose in a bud vase and a handwritten card from the host creates the most emotionally resonant moment of the entire shower, and the reason no one makes it is that it requires someone who knows the bride well enough to choose the right photos.
The setup costs under $15 in frames and one bunch of flowers, takes twenty minutes to arrange, and produces the element guests mention first when the bride asks what they remember about the shower — and for the gifts the bride receives at that same table and how to brief guests so the memory table has the right context alongside the gifts, the bridal shower gifts guide covers the complete gift table and receiving setup.
Choose three or four of these eleven and do them properly rather than attempting all eleven and spreading the time and budget too thin — the shower that looks considered is almost always the one where a small number of elements were executed with real attention rather than a full checklist assembled at the last minute.
For the at-home version of every element here applied specifically to the surfaces, furniture, and lighting of a home setting, the at-home bridal shower table decorations guide covers each room surface and how these DIY projects integrate with what you already have.
For budget-first planning across all eleven ideas, the budget bridal shower guide maps the spend-versus-impact return on every element so you know where the money actually lands where guests look.